
The Ender 3 Pro is a popular 3D printer known for its affordability and high print quality․ Assembly requires attention to detail to ensure proper functionality and safety․
Following the step-by-step guide helps users achieve optimal results․ Proper assembly ensures smooth operation, accurate prints, and extends the printer’s lifespan․ Start with unboxing and inventory․
Overview of the Ender 3 Pro
The Ender 3 Pro is a highly affordable and versatile 3D printer designed for both hobbyists and professionals․ Known for its open-frame design, it offers excellent print quality and durability․
Key features include a heated bed for printing various filaments, a magnetic bed surface, and an improved extruder․ Its modular design allows for easy upgrades and customization․
The printer supports a wide range of materials, making it ideal for diverse projects․ With a strong community backing, it remains a top choice for those seeking reliability and performance․
Its ease of assembly and robust construction ensure a smooth printing experience․ The Ender 3 Pro is a great entry point for beginners while offering advanced features for experienced users․
Regular updates and community-driven enhancements keep it at the forefront of affordable 3D printing technology․ The printer’s versatility and affordability make it a popular choice worldwide․
Importance of Proper Assembly
Proper assembly of the Ender 3 Pro is crucial for ensuring safety, performance, and durability․ Incorrect assembly can lead to mechanical failures, safety hazards, and poor print quality․
A well-assembled printer guarantees precise movement of axes, consistent extrusion, and reliable operation․ It also prevents potential damage to components, reducing the need for costly repairs or replacements․
Additionally, proper assembly ensures compliance with safety standards, minimizing risks of electrical or thermal hazards․ Taking the time to follow instructions carefully pays off in the long run with smoother printing experiences and fewer troubleshooting issues․

Preparation for Assembly
Begin by unboxing and inventorying all parts, ensuring nothing is missing․ Gather necessary tools and materials, and review safety guidelines to ensure a smooth process․
Unboxing and Inventory of Parts
Start by carefully unboxing the Ender 3 Pro and organizing all components․ Check for any damage or missing items․ Inventory includes the frame, gantry, extruder, motors, belts, pulleys, and hardware․ Ensure all small parts like screws, nuts, and Allen keys are accounted for․ Separate and label components for easy access during assembly․ Review the provided manual or online guide to familiarize yourself with each part’s purpose and location․ Organize tools and materials on a clean, stable workspace to streamline the assembly process․ Proper inventory ensures a smooth and efficient build experience․
Tools and Materials Needed
To assemble the Ender 3 Pro, you’ll need specific tools and materials․ Essential tools include an Allen wrench set (2mm, 3mm, and 4mm), a screwdriver (Phillips and flathead), pliers, a wrench, and cable ties․ Additional items like gloves, a clean workbench, and a digital caliper can be helpful․ Ensure all tools are within reach to streamline the process․ Proper materials like screws, belts, and wires are provided in the kit․ Having everything ready minimizes delays and ensures a smooth assembly experience․ Organize tools and materials to avoid losing small parts during the build․
Safety Precautions
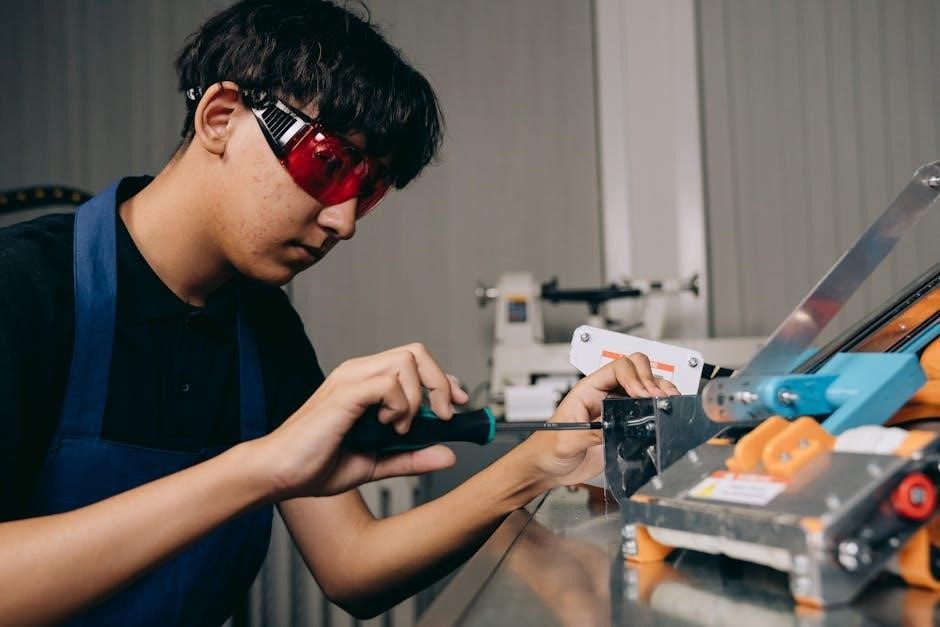
Ensure a safe assembly process by following essential precautions․ Always work in a well-ventilated area, away from children and pets․ Wear protective gloves and safety goggles when handling sharp or heavy components․ Avoid over-tightening screws, as this can damage the frame or motors․ Disconnect the power supply before working on electrical components to prevent shocks․ Never touch heated parts like the nozzle or bed during or after assembly․ Keep the workspace clean and organized to avoid tripping hazards․ Follow proper lifting techniques for heavy parts to prevent injury․ Adhere to these guidelines to ensure a safe and successful assembly experience․

Main Assembly Steps
Begin with assembling the frame, then install the X-axis, Y-axis, and Z-axis motor․ Next, attach the extruder and connect all components securely․ Proceed methodically․
Assembling the Frame
The frame is the foundation of the Ender 3 Pro․ Begin by positioning the Z-axis motor assembly on the base, securing it with M4 screws․ Ensure the motor aligns with the threaded holes on the aluminum profile․
Next, attach the gantry to the frame using the provided screws․ Tighten all bolts evenly to maintain structural integrity․ Double-check the alignment to prevent printing issues later․ Proper frame assembly ensures stability and accuracy․
Installing the X-Axis
Installing the X-axis is a critical step in the Ender 3 Pro assembly․ Start by attaching the gantry to the frame using the provided screws․ Ensure the gantry is level and secure․
Next, slide the X-axis carriage onto the gantry rails, making sure it moves smoothly․ Attach the belt to the X-axis motor and carriage, ensuring proper tension․ Tighten all screws firmly to prevent any movement during printing․
Finally, test the X-axis by manually moving it along the gantry․ Ensure there is no binding or resistance, as this could affect print quality․ Proper installation guarantees precise horizontal movement․
Mounting the Y-Axis
Mounting the Y-axis involves securing the Y-axis plate to the printer’s frame․ Attach the plate using the provided screws, ensuring it is aligned properly with the frame’s mounting holes․
Next, loop the Y-axis belt around the motor pulley and idler pulley, ensuring it is tight but not overly strained․ Adjust the belt tension by sliding the idler pulley along the axis until it feels firm but still movable;
Tighten the idler pulley screws to secure the belt in place․ Finally, test the Y-axis by manually moving it back and forth to ensure smooth, even motion without binding․
This step is crucial for precise bed leveling and print quality․
Attaching the Z-Axis Motor
Position the Z-axis motor assembly over the base frame, aligning the mounting holes with those on the aluminum profile․ Secure it using M4 screws, tightening firmly but avoid over-tightening․
Connect the Z-axis motor cable to the motherboard, ensuring proper alignment with the connector pins․ Next, attach the Z-axis lead screw to the motor shaft, ensuring it is seated correctly․
Mount the Z-axis limit switch to the frame, adjusting its position to trigger when the print head reaches the top of its travel․ Finally, install the Z-axis belt, ensuring it is properly seated on both the motor and idler pulleys․
Adjust belt tension for smooth operation, ensuring the axis moves evenly without binding․
Connecting the Extruder
Mount the extruder assembly to the X-axis carriage using the provided screws․ Ensure it is securely fastened to maintain proper alignment during printing․
Insert the PTFE tubing into the extruder, feeding it through the guide until it reaches the hotend․ Connect the other end of the tubing to the hotend inlet, ensuring a snug fit․
Insert the filament through the extruder, guiding it through the PTFE tubing and into the nozzle․ Use the extrusion handle to manually push the filament through until it extrudes from the nozzle․
This setup prepares the printer for initial calibration and ensures proper material flow during printing․

Electrical Connections
Select the correct input voltage for your region and plug in the power cord․ Ensure all electrical connections are secure to prevent short circuits or malfunctions․
Wiring the Motherboard
Connect the power supply to the motherboard, ensuring the voltage matches your region․ Carefully attach sensor wires, motor cables, and the extruder connector to their respective ports․ Use the provided diagrams or online guides to verify wire placement․ Secure all connections firmly to avoid loose wires․ If using Marlin firmware, ensure the configuration matches your setup․ Double-check for any short circuits using a multimeter before powering on․ Proper wiring ensures smooth operation and prevents damage to components․ Consult the user manual or Creality’s official GitHub repository for detailed wiring schematics and updates․
Connecting Sensors and Motors
Connect the X, Y, and Z-axis motor cables to their designated ports on the motherboard․ Ensure the wires are securely plugged in and properly routed․ Attach the BLTouch or other sensor cables to the correct sensor ports, following the motherboard diagram․ Verify that all motor cables match their respective axes to avoid operational issues․ If using an upgraded sensor, consult the firmware settings to ensure compatibility․ Double-check the connections for tightness and correct orientation to prevent malfunctions․ Properly connected sensors and motors are essential for accurate print quality and smooth machine operation․
Power Supply Setup
Select the correct input voltage (230V or 115V) to match your local mains․ Connect the power supply to the motherboard using the appropriate ports․ Securely plug in the power cord to both the supply and an outlet․ Ensure the heated bed connector is firmly attached to the power supply․ Mount the power supply unit in a stable, well-ventilated area to prevent overheating․ Double-check all connections for tightness and proper orientation․ Power on the printer and verify that all components receive power without issues․ Proper power supply setup is critical for safe and reliable operation․

Firmware and Software Installation
Download the latest firmware from Creality’s official website or GitHub․ Install the firmware using compatible software․ Configure printer settings and ensure all features function properly after installation․
Downloading and Installing Firmware
Visit Creality’s official website or GitHub repository to download the latest firmware for the Ender 3 Pro․ Ensure you select the correct version, such as Marlin 2;0․6 or newer, for compatibility․ Extract the downloaded files and install the Arduino IDE or other recommended software․ Connect the printer to your computer using a USB cable and upload the firmware․ Follow the provided instructions for flashing the firmware․ This step is crucial for enabling advanced features and ensuring smooth operation․ Proper installation guarantees optimal performance and compatibility with your printer’s hardware․
Configuring Printer Settings
After installing the firmware, access the printer’s control panel to configure settings․ Set the correct voltage (230V or 115V) to match your power supply․ Adjust the Z-offset to ensure proper first-layer adhesion․ Define the print bed size and axis limits․ Enable features like bed leveling, thermal protection, and filament runout detection․ Configure the extruder steps if necessary․ Save all settings to ensure they are retained․ Proper configuration ensures optimal performance, safety, and print quality․ Refer to the user manual for specific settings tailored to the Ender 3 Pro․

Final Calibration
Complete bed leveling, Z-offset adjustment, and extruder calibration for precise prints․ These steps ensure proper machine function and accurate layer adhesion․
Bed Leveling
Bed leveling ensures the print bed is evenly aligned with the nozzle, crucial for consistent first-layer adhesion․ Start by loosening the bed springs and adjusting the knobs to level the bed manually․ Use a piece of paper to check the gap between the nozzle and bed at each corner․ Tighten the springs once the bed is level․ For auto bed leveling, install a BLTouch sensor and configure it in the firmware․ Proper leveling prevents print failures and enhances overall print quality․
Calibrating the Extruder
Calibrating the extruder ensures consistent filament flow and proper layer adhesion․ Insert filament into the extruder, guiding it through the nozzle․ Use the extrusion handle to push filament until it exits cleanly․ Measure the extrusion length to verify accuracy․ Adjust the idler tension and gear alignment if necessary․ Ensure the extruder is free from obstructions and that the PTFE tube is securely connected․ Proper calibration prevents under or over-extrusion, leading to smoother prints and reduced risk of clogs․ Regular checks maintain optimal performance and ensure high-quality printing results․

Troubleshooting Common Issues
Common issues during assembly include misaligned belts, clogged nozzles, and bed leveling problems․ Identifying and resolving these promptly ensures smooth operation and prevents print failures․
Identifying and Solving Assembly Problems
During assembly, issues like misaligned belts, loose screws, or incorrect wiring can arise․ Start by reviewing each step to ensure all parts are properly secured․ Check for clogged nozzles or filament jams, which can halt extrusion․ Bed leveling problems are common; adjust the springs and recalibrate if necessary․ If the printer doesn’t power on, verify the power supply connections․ Consult the user manual or online forums for troubleshooting guides specific to your issue․ A methodical approach ensures quick resolution, preventing delays in your printing journey․ Regular maintenance and proper assembly practices help minimize these issues․

Maintenance and Upgrades
Regularly clean and lubricate moving parts to ensure smooth operation․ Upgrade components like the extruder or add cooling fans for improved performance and print quality․
Regular Maintenance Tips
Regular maintenance is crucial for optimal performance․ Lubricate the X, Y, and Z axes every 50 print hours․ Check and tighten all bolts periodically․ Clean the print head and nozzle regularly to prevent clogs․ Ensure belts are properly tensioned for accurate prints․ Perform bed leveling every 10 prints or when prints show adhesion issues․ Update the firmware to the latest version for improved functionality․ Clean dust from fans and heat sinks to maintain proper cooling․ Replace worn-out pulleys or bearings if necessary․ Keep the printer in a dry, stable environment to avoid rust or electrical issues․ Schedule these tasks to extend the printer’s lifespan and ensure consistent results․
Upgrading Components
Upgrading components can significantly enhance the performance and functionality of your Ender 3 Pro․ Common upgrades include installing a dual Z-axis system for improved stability, adding a BLTouch for automatic bed leveling, and upgrading to an all-metal extruder for better heat management․ Replacing the PTFE tubing with Capricorn tubing can reduce clogging issues․ Silent stepper motor drivers can minimize noise․ Firmware upgrades, such as installing Marlin 2․0, offer advanced features and improved compatibility․ These upgrades not only improve print quality but also extend the printer’s versatility and longevity․ Always follow specific upgrade guides to ensure compatibility and proper installation․