alice night one user manual

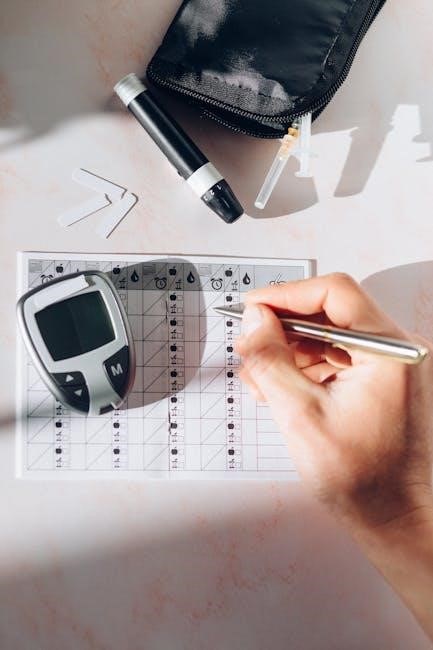
The Alice NightOne is a home sleep apnea test (HSAT) device, designed for convenient sleep assessment.
It allows patients to undergo diagnostic testing within the comfort of their own homes, simplifying the process.

What is the Alice NightOne?

This device, manufactured by Philips Respironics, is a compact and user-friendly system for detecting sleep apnea.
It records key physiological signals during sleep, providing valuable data for medical professionals.

Purpose of the Home Sleep Apnea Test (HSAT)

The primary goal of the HSAT is to identify the presence and severity of obstructive sleep apnea (OSA).
Early detection and diagnosis are crucial for managing this common, yet often undiagnosed, condition.

The Alice NightOne is a comprehensive home sleep apnea testing (HSAT) device created by Philips Respironics. It’s a streamlined system designed for single-night use, offering a comfortable and convenient alternative to traditional lab-based sleep studies.

The device utilizes a simplified setup, including an effort belt, nasal cannula, and pulse oximeter, to monitor breathing patterns and oxygen levels during sleep. Its intuitive design, as highlighted in quick start guides, aims to ensure accurate data collection for effective diagnosis.

The HSAT, utilizing the Alice NightOne, aims to diagnose obstructive sleep apnea (OSA), a condition where breathing repeatedly stops and starts during sleep. This test conveniently assesses a patient’s respiratory effort, oxygen saturation, and heart rate overnight.

Identifying OSA is vital, as it’s linked to various health risks, including cardiovascular problems and daytime fatigue. The HSAT provides crucial data for healthcare professionals to determine appropriate treatment plans and improve patient well-being.

Unboxing and Device Overview

The Alice NightOne kit contains essential components for a successful sleep study. Familiarizing yourself with these items and the device’s features is a crucial first step.

Components Included in the Kit

Expect an Alice NightOne device, effort belt, nasal cannula, pulse oximeter, and adhesive sensors. A quick start guide assists with setup and operation.

Understanding the Device Icons

The device features icons indicating sensor connections. Green lights confirm proper functionality of the effort belt, cannula, and oximeter sensors.

Upon opening your Alice NightOne kit, you’ll find several key components necessary for completing your home sleep apnea test. These include the Alice NightOne device itself, which is the central recording unit. You will also receive an effort belt designed to measure your breathing effort during sleep.

Additionally, the kit contains a nasal cannula for monitoring airflow, and a pulse oximeter to track your blood oxygen levels. Several adhesive sensors are included for secure attachment of these components. Finally, a quick start guide is provided to assist with setup and operation, ensuring a smooth testing experience.

The Alice NightOne device features intuitive icons on its top panel, providing real-time feedback on sensor connectivity. These icons illuminate to indicate proper function. Specifically, the effort belt, nasal cannula, and pulse oximeter each have a corresponding icon.

A solid green light for each icon signifies a secure connection and accurate data recording. If an icon is not lit or displays a different color, it indicates a potential issue with that specific sensor, requiring attention before starting the test.

Preparing for Your Sleep Study

Prior to your sleep study, ensure optimal sensor adhesion and data quality. Wearing a comfortable t-shirt or loose-fitting top is recommended for proper belt placement.

Wearing a T-Shirt or Loose Fitting Top

A t-shirt facilitates secure placement of the effort belt around your chest, ensuring accurate respiratory effort measurements throughout the night.

Ensuring Sensors are Dry

It’s vital that all sensor application sites are clean and completely dry before applying the sensors. Moisture can interfere with signal transmission.

For optimal results with the Alice NightOne HSAT, wearing a t-shirt or loose-fitting top during your sleep study is highly recommended. This clothing choice provides a comfortable and secure base for correctly positioning the effort belt.

The effort belt, crucial for measuring your breathing effort, needs to be snug but not constricting. A t-shirt prevents direct skin contact, enhancing comfort and ensuring the belt remains in the correct position throughout the night, leading to more accurate data collection.

Maintaining dry sensors is absolutely critical for accurate data collection with the Alice NightOne. Moisture can interfere with the sensors’ ability to properly record your physiological signals during sleep. Before applying any sensor – the effort belt, nasal cannula, or pulse oximeter – ensure your skin is clean and completely dry.

Avoid applying lotions or oils to the areas where the sensors will be placed. Even slight dampness can compromise the test results, potentially leading to an inaccurate diagnosis.

Attaching the Sensors

Proper sensor placement is vital for a successful sleep study with the Alice NightOne. This involves carefully applying the effort belt, nasal cannula, and pulse oximeter according to the guide.

Applying the Effort Belt

Place the effort belt snugly around your chest, ensuring it’s positioned correctly to measure breathing effort. Wear a t-shirt or loose-fitting top.

Connecting the Nasal Cannula

Gently insert the nasal cannula into your nostrils, ensuring a comfortable and secure fit for airflow monitoring.

Positioning the Pulse Oximeter

Attach the pulse oximeter to your finger, making sure it’s properly aligned to accurately measure your oxygen saturation levels.

The effort belt is a crucial component, measuring your chest movement during breathing. Place it securely around your chest, directly over your ribs, ensuring a snug but comfortable fit.
It’s recommended to wear a t-shirt or loose-fitting top underneath the belt to prevent skin irritation and ensure accurate readings.

The belt should not be too tight, restricting your breathing, nor too loose, allowing for movement that compromises data collection. Refer to the picture guide included in your kit for visual assistance with correct positioning. Proper placement is key for reliable results.

The nasal cannula gently delivers air to monitor your breathing patterns during sleep. Carefully insert the prongs of the cannula into your nostrils, ensuring a comfortable and secure fit. Connect the cannula’s tubing to the designated port on the Alice NightOne device.

Ensure the connection is firm to prevent dislodgement during the night. Avoid excessive force when inserting the prongs. A proper seal is vital for accurate airflow measurements, contributing to a reliable sleep study result.

The pulse oximeter measures your blood oxygen saturation and pulse rate throughout the night. Securely attach the device to your index finger, ensuring it fits snugly but isn’t overly tight. Connect the pulse oximeter cable to the corresponding port on the Alice NightOne unit.

Verify the sensor is properly aligned for accurate readings. Movement during sleep can sometimes disrupt the signal, so a secure fit is essential for reliable data collection during your sleep study.

Starting the Device

To begin your sleep study, press the power button on the Alice NightOne. Confirm all sensor connections are established, indicated by solid green lights on the device.

Powering On the Alice NightOne

Pressing the power button initiates the data recording process. Ensure the device is fully powered on before retiring for the night.

Verifying Sensor Connections (Green Lights)

Green lights signify proper sensor function. If lights are absent or red, re-check connections before starting your sleep study.

Initiating the device is straightforward. Locate the power button on the top of the Alice NightOne unit. A single press activates the system, beginning the data collection process for your home sleep apnea test. The device will briefly display a startup screen, confirming it’s powering on correctly.

Ensure the device remains stationary throughout the night. Avoid pressing any other buttons unless specifically instructed to do so during troubleshooting. A fully powered-on device is essential for accurate data recording and a successful sleep study.

Confirming proper sensor attachment is vital. After connecting all sensors – the effort belt, nasal cannula, and pulse oximeter – observe the indicator lights on the Alice NightOne. Each sensor has a corresponding icon on the device’s top panel.

A solid green light beneath each icon signifies a secure and functioning connection. If any light is red or flashing, re-check the sensor attachment. Correct connections ensure accurate data capture during your sleep study.
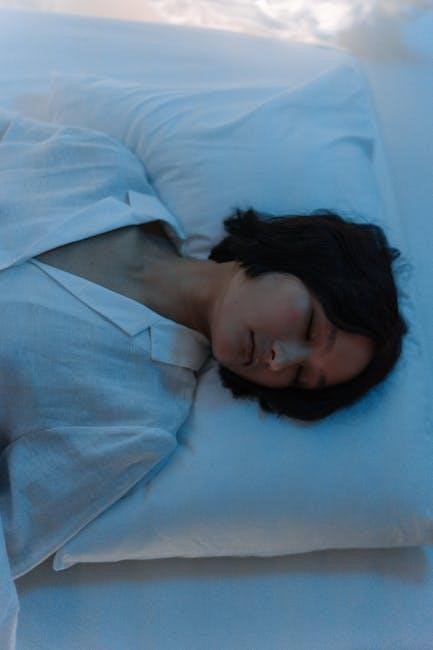
During the Night

Sleep as naturally as possible while wearing the Alice NightOne sensors. Avoid disruptions and try to maintain your regular sleep schedule for accurate results.

What to Expect While Sleeping

The device is designed for comfort and minimal interference. You may notice the sensors, but they shouldn’t significantly impact your sleep quality.

Troubleshooting Common Issues During Sleep

If a sensor detaches, gently reattach it if possible. Note any issues for your healthcare provider, but prioritize uninterrupted sleep.

The Alice NightOne is designed to be as unobtrusive as possible during your sleep. You’ll likely be aware of the sensors initially, but most users quickly adjust and experience minimal discomfort.

The device itself is quiet and shouldn’t disturb your sleep or that of your partner. Focus on relaxing and sleeping as you normally would. Try to avoid focusing on the equipment; simply allow yourself to fall asleep naturally.

Remember, the goal is to capture a representative night of sleep, so maintaining your usual routine is key to accurate results.

If a sensor becomes detached during the night, try to gently reattach it if possible, without fully waking yourself. If you can’t, don’t worry excessively; the device will still record data from the remaining sensors.

Should the device beep intermittently, check the sensor connections. Ensure the effort belt remains securely around your chest. Minor movements are normal, but significant disruptions may affect data quality.

Avoid excessive tossing and turning to maintain sensor integrity, but prioritize comfortable sleep.

In the Morning

Upon waking, power off the Alice NightOne device promptly. Carefully remove all attached sensors – the effort belt, nasal cannula, and pulse oximeter – before starting your day.

Powering Off the Device

To power off the Alice NightOne after your sleep study, simply press and hold the power button located on the top of the device. Continue holding the button until the screen completely turns off and all indicator lights cease to illuminate. This ensures the device is fully shut down and prevents any further data recording.

Do not disconnect the sensors before powering off the device, as this could potentially interrupt data transfer. Once powered off, you can then proceed to carefully remove all sensors from your body.

Removing the Sensors

After powering off the Alice NightOne, gently remove each sensor. Begin with the pulse oximeter, carefully sliding it off your finger. Next, disconnect the nasal cannula, being mindful not to pull forcefully. Finally, unfasten and remove the effort belt from around your chest.

Dispose of the nasal cannula appropriately. The effort belt and pulse oximeter should be returned with the device, as instructed in the kit’s return instructions.

Data Download and Transmission

The Alice NightOne automatically collects data during your sleep study. This information is then downloaded and transmitted for analysis by your healthcare provider.

How Data is Collected

The device records airflow, breathing effort, and oxygen saturation levels throughout the night, storing it internally for later retrieval.

Returning the Device

Follow the provided instructions to return the Alice NightOne device and associated components to Philips for data processing.

The Alice NightOne meticulously gathers crucial physiological data while you sleep. It utilizes sensors to monitor airflow, detecting any obstructions that may indicate sleep apnea events. Simultaneously, the effort belt measures your breathing effort, revealing patterns of shallow or labored respiration.

Furthermore, the pulse oximeter continuously tracks your blood oxygen saturation levels, identifying potential drops associated with apneas. All this information is digitally recorded and stored within the device’s internal memory throughout the entire sleep study duration, ensuring comprehensive data capture.

After completing your sleep study, carefully remove all sensors and power off the Alice NightOne. Place the device, along with all attached components – effort belt, nasal cannula, and pulse oximeter – back into the provided shipping container. Ensure everything is securely packed to prevent damage during transit.

A prepaid shipping label will be included in the kit; affix this label to the box and drop it off at the designated shipping carrier location. Prompt return is vital for timely data analysis and report generation by your healthcare provider.

Safety Precautions

Always follow the user manual’s instructions carefully. Crucially, keep the Alice NightOne device and all sensors completely dry to avoid malfunction or damage.

Avoiding Water Damage

Protect the device from any exposure to liquids. Water damage can render the device unusable and compromise the accuracy of the sleep study.

Following User Manual Instructions

Adhering to the provided guidelines ensures proper device operation and accurate data collection for a reliable sleep apnea assessment.

It is essential to protect the Alice NightOne device and its accompanying sensors from any contact with liquids. Exposure to water can cause significant damage, potentially rendering the device inoperable and compromising the integrity of the collected sleep data. Ensure the device is used in a dry environment, and avoid using it in bathrooms or near sources of moisture. Be particularly careful during sensor application and removal to prevent accidental wetting. If the device or sensors become wet, immediately discontinue use and consult the user manual or customer support for guidance.

Thoroughly review the Alice NightOne user manual before initiating your home sleep apnea test. The manual provides detailed guidance on device setup, sensor application, troubleshooting, and safety precautions. Adhering to these instructions is crucial for obtaining accurate results and ensuring a successful sleep study. Pay close attention to the diagrams and illustrations for proper sensor placement. Ignoring the manual’s recommendations may lead to inaccurate data or device malfunction, impacting your diagnosis.

Troubleshooting

If you encounter issues like sensor disconnections or the device failing to power on, consult the user manual for solutions. Refer to the guide for common problems and their fixes.

Sensor Disconnection Issues

Ensure sensors are securely connected; check the device icons for green lights indicating proper function. Re-apply if needed.

Device Not Powering On

Verify the device is adequately charged and the power button is pressed correctly. Consult the manual for further assistance.

Experiencing sensor disconnections during the sleep study is relatively common. The Alice NightOne utilizes indicator lights to signal connection status. Specifically, ensure each sensor – effort belt, nasal cannula, and pulse oximeter – displays a solid green light on the device.

If a light is off or blinking, gently re-secure the corresponding sensor. Confirm proper placement according to the quick start guide’s illustrations. A loose connection prevents accurate data recording, potentially invalidating the test results. Persistent issues should be noted for your healthcare provider.

If the Alice NightOne fails to power on, first verify the device is adequately charged. Connect it to a power source using the provided cable and allow sufficient time for charging. Ensure the power outlet is functioning correctly by testing it with another device.

If charging doesn’t resolve the issue, check for any physical damage to the power cable or the device itself. Consult the user manual for specific troubleshooting steps or contact Philips customer support for assistance. Do not attempt to disassemble the device.

Warnings and Cautions

Always follow the user manual’s safety instructions carefully. Keep the Alice NightOne device and sensors completely dry to prevent malfunction or damage. Avoid any modifications.

General Safety Guidelines

Ensure proper sensor application and device operation for accurate results. Do not use the device if damaged, and seek professional guidance if needed.

Contraindications

This device is not suitable for individuals with certain medical conditions; consult your doctor before use. Follow their specific recommendations.

Prior to initiating the sleep study, meticulously review the entire user manual to fully comprehend the device’s operation and safety protocols. Ensure all sensors are correctly applied, as detailed in the provided instructions, to guarantee accurate data collection. Regularly check sensor connections throughout the night, verifying the green indicator lights. If any discomfort arises during use, immediately pause the test and readjust the sensors. Do not attempt to repair the device yourself; contact Philips customer support for assistance. Always prioritize your safety and well-being during the testing process.

The Alice NightOne HSAT is not suitable for individuals with certain pre-existing medical conditions. Patients with severe lung disease, unstable cardiovascular issues, or neuromuscular disorders should not utilize this device without prior physician approval. Individuals experiencing acute illness, or those with known allergies to adhesive materials, are also advised against using the system. Furthermore, the test is contraindicated for those under the influence of sleep-inducing medications that could impact results.

Frequently Asked Questions (FAQ)

Common questions regarding the HSAT process involve sensor placement, device operation, and data transmission. Users often inquire about expected sleep patterns during testing and troubleshooting tips.

Common Questions About the HSAT Process

Many ask about potential discomfort and what happens after the study is completed, seeking clarity on result interpretation and follow-up care.

Patients frequently ask about the comfort level while wearing the sensors overnight. Concerns often arise regarding potential skin irritation or difficulty sleeping with the device attached. Many inquire about the necessity of a completely dark and quiet room for accurate readings.

Others want to know if they can use their regular pillows and blankets, or if specific sleep positions are recommended. Furthermore, questions about the device’s battery life and the process of data transmission are common, ensuring a smooth and successful sleep study.

Resources and Support

For comprehensive assistance, visit the Philips website dedicated to the Alice NightOne. Additionally, direct customer support is available to address any questions or concerns you may have.

Philips Website for Alice NightOne

The official Philips website (philips.com/alicenightone) provides detailed information, FAQs, and troubleshooting guides for the device.

Contacting Customer Support

Philips customer support can be reached through their website or by phone for personalized assistance with your HSAT experience.

Should you encounter any difficulties or require further clarification beyond the provided materials, Philips offers dedicated customer support channels. Accessing support ensures a smooth and accurate testing process. You can typically find contact information, including phone numbers and email addresses, on the official Philips website dedicated to the Alice NightOne device.

Alternatively, your healthcare provider who prescribed the HSAT may also be able to assist with troubleshooting or connect you with Philips support directly. Don’t hesitate to reach out for help if needed!

zebra ds2278 manual

Zebra DS2278 Manual: A Comprehensive Guide

This comprehensive guide details the Zebra DS2278 cordless 1D/2D handheld imager, offering users a readily available PDF manual from Zebra Technologies, as of today.

The Zebra DS2278 is a versatile, high-performance cordless 1D/2D handheld imager designed to deliver a superior scanning experience across a wide range of applications. This manual serves as a complete resource for understanding, setting up, and maintaining your DS2278 scanner. It’s engineered for speed and reliability, boosting employee productivity and streamlining operations in retail, healthcare, and various other industries.

As of today, March 5th, 2026, users can readily access the official Zebra Technologies DS2278 User Manual (model UZ7DS2278) online in PDF format, without any registration requirements. This guide provides detailed instructions, troubleshooting tips, and essential safety information to ensure optimal performance and longevity of your device. The DS2278 offers a balance of functionality and affordability, making it an ideal choice for businesses seeking a robust scanning solution.

Key Features and Benefits

The Zebra DS2278 boasts several key features that contribute to its exceptional performance. Its cordless design provides freedom of movement and increased efficiency, while its ability to scan both 1D and 2D barcodes offers versatility. The scanner’s robust build quality ensures durability in demanding environments, reducing downtime and maintenance costs.

Benefits include faster checkout speeds, improved data accuracy, and enhanced operational efficiency. The DS2278’s intuitive design simplifies operation, minimizing training time for employees. Accessing the official user manual (UZ7DS2278) provides comprehensive guidance for maximizing these benefits. Furthermore, its compatibility with various host devices via Bluetooth streamlines integration into existing workflows, offering a cost-effective and reliable scanning solution for businesses of all sizes.

Unboxing and Package Contents

Upon receiving your Zebra DS2278, carefully inspect the packaging for any signs of damage during transit. Once opened, verify that all listed components are present. Typically, the package includes the DS2278 scanner unit itself, a USB charging cable for powering the device, and a quick start guide to facilitate initial setup.

Accessing the full DS2278 User Manual (model UZ7DS2278) provides a detailed inventory list and visual representations of each item. Some packages may also contain additional accessories, such as a wrist strap for enhanced security during mobile scanning operations. Retain the original packaging for potential warranty claims or future transportation needs. Ensure all protective films are removed before first use to optimize scanning performance.

Setting Up Your DS2278

Begin by charging the device using the provided USB cable, then pair it wirelessly with your host device via Bluetooth for seamless operation.

Charging the Device

To ensure optimal performance, fully charge your Zebra DS2278 before initial use. Connect the provided USB cable to the scanner’s charging port and a suitable power adapter or computer USB port. The indicator lights will display the charging status; typically, a solid light indicates a full charge, while a blinking light signifies charging in progress.

Charging time may vary depending on the power source and the current battery level, but generally takes several hours for a complete charge. Avoid using damaged or non-Zebra-approved charging cables, as they may compromise battery health and safety. It’s recommended to periodically fully discharge and recharge the battery to maintain its capacity. Do not operate the scanner while it is charging, as this could potentially damage the device or the battery.

Pairing with a Host Device (Bluetooth)

Establishing a Bluetooth connection with your Zebra DS2278 is straightforward. First, ensure Bluetooth is enabled on your host device (smartphone, tablet, or computer). Then, put the DS2278 into pairing mode – typically achieved by pressing and holding a designated button on the scanner, as detailed in the full user manual.

Your host device should then detect the DS2278 as an available Bluetooth device. Select it from the list and follow any on-screen prompts to complete the pairing process. A successful pairing will usually be indicated by a visual or audible confirmation on both devices. Remember to consult the complete manual for specific button combinations and troubleshooting steps if pairing fails. Once paired, the scanner will automatically reconnect to the host device when in range.

Configuring Basic Settings

The Zebra DS2278 offers several configurable basic settings to optimize performance. Access these settings typically through the DataWedge software on Android devices, or via configuration barcodes downloadable from the Zebra website for other host systems. Key settings include scan trigger style (presentation or trigger), volume level, and feedback modes (beeps and vibrations).

You can also adjust the Bluetooth connection interval and discoverability settings. For optimal scanning, configure the appropriate symbologies (barcode types) to be read. The user manual provides a comprehensive list of available settings and detailed instructions on how to modify them. Regularly reviewing these settings ensures the scanner operates efficiently and accurately for your specific needs.

Understanding the DS2278 Interface

The DS2278 interface features intuitive buttons and indicators, alongside versatile scanning modes and robust decoding capabilities for both 1D and 2D barcodes.

Buttons and Indicators

The Zebra DS2278 boasts a user-friendly interface, primarily controlled through a minimal set of buttons. Typically, a trigger button initiates the scanning process, allowing for quick and efficient data capture. A status button often provides feedback on connectivity, battery life, and operational mode. These buttons are strategically positioned for comfortable, one-handed operation, enhancing productivity in various work environments.

Visual indicators, such as LEDs, play a crucial role in communicating the scanner’s status. Different colored lights signify successful scans, low battery warnings, or pairing mode activation. These indicators offer immediate visual cues, reducing the need to consult the device’s settings frequently. Understanding these signals is key to maximizing the DS2278’s functionality and troubleshooting potential issues effectively. The clear and concise feedback provided by the buttons and indicators contributes to a seamless user experience.

Scanning Modes Explained

The Zebra DS2278 offers versatile scanning modes to adapt to diverse operational needs. Presentation mode allows for hands-free scanning, ideal for point-of-sale applications where items are presented to the scanner. Trigger mode requires pressing the scan trigger for each scan, providing greater control in environments needing deliberate scanning actions.

Inventory mode optimizes scanning for large-volume counting, while datawedge mode enables customized data processing before transmission. These modes can be configured via the DataWedge software, offering extensive control over data capture and formatting. Understanding each mode’s functionality is crucial for maximizing efficiency and accuracy. Switching between modes is typically straightforward, often achieved through barcode configuration or the DataWedge application, ensuring adaptability for various tasks and workflows.

Decoding Capabilities (1D/2D)

The Zebra DS2278 excels in decoding a wide array of symbologies, supporting both 1D and 2D barcodes with exceptional speed and accuracy. It reliably reads common 1D barcodes like UPC, EAN, and Code 39, essential for retail and logistics. Furthermore, it decodes 2D barcodes such as QR codes and Data Matrix, increasingly prevalent in various industries for data density and tracking.

The imager’s advanced decoding algorithms ensure successful reads even on damaged or poorly printed barcodes. Users can customize which symbologies are enabled or disabled through the DataWedge software, tailoring the scanner to specific application requirements. This flexibility optimizes performance and prevents misreads, contributing to streamlined operations and reduced errors in data capture processes.

Advanced Configuration Options

Unlock the DS2278’s full potential through DataWedge, enabling customized data formatting, symbology control, and wireless settings for optimal performance.

Data Formatting and Editing

The Zebra DS2278 offers robust data formatting capabilities through its DataWedge software. Users can precisely control how scanned data is presented before transmission to the host system. This includes appending, prepending, and transforming data using custom rules. For example, you can add a tab character after each scan, or convert all data to uppercase.

DataWedge allows for the creation of custom profiles tailored to specific applications. Within these profiles, you can define rules to modify scanned data based on symbology, data length, or specific patterns. This is particularly useful for integrating with legacy systems that require data in a specific format. Editing options include trimming leading or trailing characters, replacing specific strings, and validating data against predefined criteria. These features ensure data accuracy and streamline integration processes.

Symbology Enablement/Disablement

The Zebra DS2278’s DataWedge software provides granular control over which barcode symbologies are enabled or disabled. This customization is crucial for optimizing scanning performance and preventing misreads in specific environments. Users can selectively activate only the symbologies relevant to their operations, improving speed and accuracy.

Through DataWedge, you can easily enable or disable 1D and 2D symbologies like Code 128, QR Code, Data Matrix, and more. Disabling unused symbologies reduces processing overhead and minimizes the chance of the scanner attempting to decode irrelevant barcodes. This feature is particularly valuable in environments with a diverse range of barcode types. Proper symbology configuration ensures the DS2278 reliably captures the intended data, enhancing overall efficiency and data integrity.

Wireless Communication Settings

The Zebra DS2278 utilizes Bluetooth for wireless connectivity, offering flexible configuration options through the DataWedge software. Users can adjust Bluetooth settings to optimize range, security, and interference resistance. Pairing mode selection allows for both classic and Bluetooth Low Energy (BLE) connections, catering to diverse host device compatibility requirements.

Within the settings, you can modify the Bluetooth radio class, influencing transmission power and range. Security settings enable PIN pairing or Secure Simple Pairing (SSP) for enhanced data protection. Furthermore, the DS2278 allows for adjustments to the Bluetooth channel hopping algorithm, minimizing interference from other wireless devices. Careful configuration of these wireless parameters ensures a stable and secure connection, maximizing the scanner’s operational efficiency in various environments.

Troubleshooting Common Issues

Addressing scanning, connectivity, and battery concerns, this section provides solutions for typical DS2278 problems, ensuring optimal performance and minimal downtime for users.

Scanning Performance Problems

If the DS2278 is failing to read barcodes consistently, several factors could be at play. First, ensure the barcode itself is undamaged and of good print quality; poor barcodes are a frequent cause of read failures. Secondly, verify the scanning window is clean and free of obstructions – dust, smudges, or scratches can significantly impede performance.

Adjusting the scanning distance and angle is also crucial. The DS2278 has an optimal range; moving closer or further away, or angling the scanner incorrectly, can lead to unsuccessful reads. Experiment with different angles and distances to find the sweet spot for each barcode type.

Consider the ambient lighting conditions. Excessive light or glare can interfere with the scanner’s ability to capture a clear image of the barcode. Finally, confirm the correct symbology is enabled within the scanner’s settings, as attempting to read an unsupported barcode type will naturally result in failure.

Connectivity Issues (Bluetooth)

Experiencing Bluetooth connection problems with your DS2278? Begin by verifying Bluetooth is enabled on both the scanner and the host device (e.g., phone, tablet, computer). Ensure the devices are within the specified Bluetooth range – typically around 30 feet, but obstructions can reduce this.

If pairing fails, try “forgetting” or removing the DS2278 from the host device’s Bluetooth settings and then re-initiating the pairing process. Confirm the scanner isn’t already connected to another device, as it can only maintain one active Bluetooth connection at a time.

Interference from other wireless devices can sometimes disrupt the Bluetooth signal. Try moving away from potential sources of interference. A full scanner reset can also resolve persistent connectivity issues, restoring the Bluetooth settings to their factory defaults.

Battery Life Concerns

Reduced battery life on your Zebra DS2278? Several factors can contribute to this. Frequent use of scanning, especially with the scanner’s illumination on, naturally drains the battery faster. Bluetooth connectivity also consumes power, so disabling it when not needed can help extend battery life.

Ensure the scanner is fully charged before each shift. Avoid exposing the device to extreme temperatures, as this can negatively impact battery performance. If the battery seems to drain rapidly even with minimal use, it might be nearing the end of its lifespan and require replacement.

Consider utilizing power-saving modes if available in the scanner’s settings. Regularly check for firmware updates, as these sometimes include battery optimization improvements.

Maintenance and Care

Regular cleaning, firmware updates, and proper storage are crucial for maintaining optimal performance and extending the lifespan of your Zebra DS2278 scanner.

Cleaning the Scanner

To ensure reliable performance, regularly clean your Zebra DS2278 scanner. Begin by powering off the device and disconnecting any cables. Use a soft, lint-free cloth dampened with isopropyl alcohol or a mild detergent solution to gently wipe down the exterior surfaces.

Pay particular attention to the scan window, as dirt and debris can significantly impact scanning accuracy. Avoid abrasive cleaners or solvents, which could damage the plastic components. For stubborn residue, lightly dampen the cloth and apply gentle pressure.

Ensure the scanner is completely dry before powering it back on. Do not submerge the scanner in any liquid. Regular cleaning prevents build-up, maintaining optimal scanning performance and prolonging the device’s operational life. Consistent care contributes to a longer-lasting, more efficient scanner.

Firmware Updates

Maintaining up-to-date firmware is crucial for optimal Zebra DS2278 performance and security. Zebra Technologies regularly releases firmware updates that address bug fixes, enhance functionality, and improve compatibility with new symbologies. Check the Zebra support website frequently for available updates specific to your DS2278 model.

The update process typically involves downloading the firmware file and utilizing Zebra’s tools, such as Device Manager or Profile Manager, to apply it to the scanner. Ensure the scanner is adequately charged or connected to a power source during the update to prevent interruption.

Carefully follow the provided instructions to avoid potential issues. Firmware updates can significantly improve scanning accuracy, speed, and overall device reliability, ensuring a consistently efficient operation. Regular updates are a proactive step towards maximizing your investment.

Storage and Handling

Proper storage and handling are essential to preserve the longevity and functionality of your Zebra DS2278 scanner. When not in use, store the device in a clean, dry environment, away from extreme temperatures, humidity, and direct sunlight. Avoid storing it with or near corrosive materials.

Protect the scanner from physical shock and impacts; while durable, dropping the device can cause internal damage. Utilize a protective case or holster when transporting the DS2278, especially in demanding environments. Regularly inspect the scanner for any signs of physical wear or damage.

Handle the scanner with care, avoiding excessive force when pressing buttons or connecting cables. Following these guidelines will help ensure reliable performance and extend the lifespan of your investment.

Safety and Regulatory Information

The DS2278 adheres to stringent compliance standards, ensuring safe operation; review the included documentation for detailed warranty details and proper disposal procedures.

Compliance Standards

The Zebra DS2278 handheld imager is engineered to meet a broad spectrum of international safety and electromagnetic compatibility (EMC) standards. These certifications demonstrate the device’s reliability and adherence to globally recognized regulations. Specifically, the DS2278 complies with standards set by agencies like the FCC (Federal Communications Commission) in the United States, ensuring minimal interference with other electronic devices.

Furthermore, it meets relevant European standards, including CE marking, signifying conformity with health, safety, and environmental protection requirements. The device also adheres to standards related to laser safety, if applicable, and radio frequency (RF) exposure limits. Zebra Technologies provides detailed compliance information within the full user manual, accessible as a downloadable PDF, outlining specific standards met and testing procedures undertaken. Users can find detailed information regarding these standards within the official documentation provided by Zebra Technologies.

Warranty Information

Zebra Technologies provides a standard warranty for the DS2278 handheld imager, protecting against defects in materials and workmanship. The duration of this warranty typically spans one year from the date of original purchase, though specific terms can vary based on region and reseller agreements. This warranty covers repair or replacement of the defective unit at Zebra’s discretion.

However, the warranty does not cover damage resulting from misuse, accidents, normal wear and tear, or unauthorized modifications. To initiate a warranty claim, customers should contact their original point of purchase or a Zebra-authorized service center. Proof of purchase, such as a receipt or invoice, is required. Extended warranty options may also be available for purchase, providing additional coverage beyond the standard period. Detailed warranty specifics are outlined in the documentation accompanying the DS2278, readily available as a PDF from Zebra’s website.

Disposal Considerations

Responsible disposal of the Zebra DS2278 imager is crucial for environmental protection. This device contains electronic components and a battery that require proper handling at the end of its lifecycle. Do not dispose of the DS2278 with general household waste. Instead, adhere to local regulations regarding electronic waste (e-waste) recycling.

Zebra encourages users to utilize designated e-waste collection points or recycling programs. These programs ensure that valuable materials are recovered and hazardous substances are managed safely. Improper disposal can lead to environmental contamination and potential health risks. Consult your local authorities or waste management services for information on e-waste disposal options in your area. Further details regarding Zebra’s commitment to environmental sustainability and responsible product disposal can be found on their official website.

schumacher battery charger manual pdf download

Schumacher Battery Charger Manual PDF Download: A Comprehensive Guide

Navigating the world of battery maintenance requires accessible resources, and this guide focuses on obtaining Schumacher charger manuals in PDF format, ensuring your device operates optimally.

Specifically, we’ll explore locating documentation for models like SE-2001, SE-3000, SE-4020, SE-4022, SE-6030, and SE-8050, streamlining the process for all users.

Understanding Schumacher Battery Chargers

Schumacher Electric Corporation has a long-standing reputation for producing reliable and innovative battery chargers, maintainers, and jump starters. These devices cater to a broad spectrum of users, from automotive enthusiasts and professional mechanics to everyday individuals needing a dependable power solution. Understanding the core functionalities of a Schumacher charger is crucial for safe and effective operation.

Generally, Schumacher chargers utilize various charging technologies, including trickle charging, fast charging, and maintenance modes, each designed for specific battery types and conditions. The SE-2001, SE-3000, SE-4020, SE-4022, SE-6030, and SE-8050 models, for instance, offer diverse features to accommodate lead-acid, AGM, and gel batteries. Proper usage involves selecting the appropriate charging mode, connecting the clamps with correct polarity, and monitoring the charging process.

Furthermore, familiarizing yourself with the charger’s safety features, such as overcharge protection and reverse polarity protection, is paramount. Consulting the specific manual for your model – available in PDF format – provides detailed instructions and safety guidelines, ensuring optimal performance and longevity of both the charger and the battery.

Popular Schumacher Models Covered

This guide specifically addresses the most frequently sought-after Schumacher battery charger models, ensuring users can readily locate their corresponding manuals. We focus on the SE-2001, a compact and versatile charger ideal for automotive and marine batteries; the SE-3000, known for its robust charging capabilities; and the SE-4020 and SE-4022, offering advanced features like microprocessor control.

Additionally, we cover the SE-6030, a popular choice for heavy-duty applications, and the SE-8050, a sophisticated charger with multiple charging modes and diagnostic functions. These models, often found in both 12V and 24V configurations, represent a significant portion of Schumacher’s product line;

Each model, documented in tri-fold leaflets (English and Spanish, 5-1/2 X 8-1/2 in), typically contains around 49 pages of detailed information, dating back to at least 1990 (9-5-90). Finding the correct PDF manual is essential for maximizing the charger’s performance and ensuring safe operation.

SE-2001 Manual Availability

The Schumacher SE-2001 battery charger manual, a tri-fold leaflet published by Schumacher Electric Corp, is a frequently requested document. While original printed versions date back to at least September 5, 1990, digital PDF copies are readily available through various online resources. Users seeking the SE-2001 manual will find it accessible on third-party manual databases like ManualsLib and ManualsOnline, offering convenient download options.

These online repositories often host scanned copies of the original documentation, providing detailed instructions on operation, safety precautions, and troubleshooting. The manual covers essential aspects of the SE-2001, including charging procedures for different battery types and understanding indicator lights.

Accessing the PDF requires a compatible PDF reader, such as Adobe Acrobat Reader, ensuring clear viewing and printing of the 49-page document.

SE-3000 Manual Availability

Similar to the SE-2001, the Schumacher SE-3000 battery charger manual is available in PDF format through online databases. This model, also documented in a tri-fold leaflet by Schumacher Electric Corp dating back to 1990, benefits from digitized versions readily accessible to users. Platforms like ManualsLib and ManualsOnline serve as key resources for locating and downloading the SE-3000 manual.

The documentation, encompassing 49 pages, provides comprehensive guidance on safe and effective battery charging practices. It details procedures for various battery types, explains the function of controls, and offers troubleshooting tips. Users can expect to find information regarding polarity connection and proper ventilation requirements.

A functional PDF reader, like Adobe Acrobat Reader, is necessary to view and print the manual effectively, ensuring optimal usability.

SE-4020 & 4022 Manual Availability

Finding the manuals for the Schumacher SE-4020 and SE-4022 battery chargers follows a similar pattern to the previously mentioned models. These chargers, also part of the Schumacher Electric Corp’s lineup documented in the 1990 leaflets, have their manuals digitized and available online. Both models share similar functionalities, often resulting in combined or closely related documentation.

Users can locate PDF versions of these manuals on third-party databases such as ManualsLib and ManualsOnline. These resources offer convenient access to the 49-page documentation, covering essential aspects like charging procedures, safety precautions, and troubleshooting steps.

The manuals detail proper battery acid handling, correct polarity connections, and the importance of adequate ventilation during charging. A compatible PDF reader, such as Adobe Acrobat Reader, is crucial for viewing and utilizing these resources effectively.

SE-6030 Manual Availability

Securing the manual for the Schumacher SE-6030 battery charger is readily achievable through online resources. Like the SE-2001, SE-3000, SE-4020, and SE-4022, documentation for this model was included in the 1990 Schumacher Electric Corp leaflets – a tri-fold, 5-1/2 x 8-1/2 inch paperback containing 49 pages of information.

Digital copies of the SE-6030 manual are commonly found on platforms like ManualsLib and ManualsOnline. These databases provide free access to the PDF format, allowing users to download and view the charger’s operational guidelines, safety instructions, and troubleshooting advice.

The manual comprehensively covers essential aspects, including proper ventilation requirements, safe battery acid handling procedures, and the critical importance of maintaining correct polarity during connections. Utilizing Adobe Acrobat Reader ensures optimal viewing and functionality of the PDF document.

SE-8050 Manual Availability

Finding the user manual for the Schumacher SE-8050 battery charger follows a similar pattern to other models in the series – SE-2001, SE-3000, SE-4020, and SE-4022. These chargers were documented in a 1990 publication by Schumacher Electric Corp, a tri-fold leaflet (5-1/2 x 8-1/2 inches) expanding to 16-1/2 inches, comprising 49 pages of detailed instructions.

Fortunately, digital versions of the SE-8050 manual are widely available online. Websites such as ManualsLib and ManualsOnline host PDF copies, offering free downloads for convenient access. These manuals detail crucial information regarding charger operation, safety protocols, and troubleshooting steps.

Users can readily view these PDFs using Adobe Acrobat Reader, the industry standard for PDF viewing and annotation. The manual emphasizes safety precautions, including proper ventilation, battery acid handling, and correct polarity connection, ensuring safe and effective charger use.

Where to Download Schumacher Charger Manuals

Locating Schumacher battery charger manuals, particularly for models like the SE-2001, SE-3000, SE-4020, SE-4022, SE-6030, and SE-8050, is readily achievable through several online avenues. The primary source is the official Schumacher Electric website, which often hosts downloadable PDFs for current and older models. However, for legacy models, alternative resources become invaluable.

Several third-party manual databases offer extensive collections. ManualsLib and ManualsOnline are prominent examples, providing searchable archives of user manuals, including those from Schumacher Electric Corp. These platforms allow users to quickly find and download the specific manual needed, often in PDF format.

Remember to verify the manual’s relevance to your specific charger model and revision date. Utilizing these resources ensures you have access to the correct documentation for safe and effective operation.

Official Schumacher Electric Website

The official Schumacher Electric website serves as the primary and most reliable source for downloading battery charger manuals. Directly accessing the manufacturer’s site ensures you obtain the most accurate and up-to-date documentation for your specific model, including the SE-2001, SE-3000, SE-4020, SE-4022, SE-6030, and SE-8050.

Typically, the website features a dedicated “Support” or “Resources” section where users can search for manuals by model number. The downloadable files are generally in PDF format, compatible with standard PDF readers. This method guarantees compatibility and avoids potential issues with outdated or incorrect information found on third-party sites.

Regularly checking the official website is recommended, as Schumacher Electric may update manuals with revisions or new information. This proactive approach ensures you always have access to the latest guidance for your charger.

Third-Party Manual Databases

When the official Schumacher Electric website doesn’t immediately yield the desired manual – perhaps for older models like the SE-2001, SE-3000, or even the SE-8050 – several third-party manual databases can prove invaluable. These platforms aggregate manuals from various manufacturers, offering a broader search scope.

Two prominent options include ManualsLib and ManualsOnline. These sites allow users to search specifically for “Schumacher battery charger manual” or input the model number directly. While convenient, it’s crucial to verify the manual’s authenticity and revision date, as information may not always be the latest version.

Always exercise caution when downloading from these sources and scan files for potential malware. These databases can be helpful supplements, but the official Schumacher website remains the preferred source for accuracy.

ManualsLib

ManualsLib stands as a widely-used online repository for user manuals, offering a substantial collection including documentation for Schumacher battery chargers. Searching for models such as the SE-2001, SE-3000, SE-4020, or SE-6030 often yields results, potentially providing access to the tri-fold, 49-page leaflets from 1990, covering both English and Spanish versions.

The platform’s interface allows for keyword searches and filtering by brand and model, simplifying the process of locating the correct manual. However, users should carefully review the document’s details – including the publication date (like 9-5-90) – to ensure it corresponds to their specific charger version.

While ManualsLib is a valuable resource, remember to exercise caution and verify the manual’s accuracy before relying on its instructions. Always prioritize safety and consult official sources when possible.

ManualsOnline

ManualsOnline presents another accessible avenue for sourcing Schumacher battery charger manuals in PDF format. Similar to ManualsLib, this platform hosts a diverse range of user guides, potentially including documentation for models like the SE-2001, SE-3000, SE-4020, SE-4022, SE-6030, and SE-8050. Users can navigate the site using keywords or brand-specific searches to pinpoint relevant manuals.

The website often provides previews of the documents, allowing you to confirm the manual’s content before downloading. As with any third-party source, verifying the manual’s date – referencing the 1990 publication date for older models – is crucial to ensure compatibility with your charger.

It’s important to remember that while ManualsOnline offers convenience, always prioritize official documentation when available and exercise caution when interpreting instructions.

PDF Reader Requirements

To effectively access and utilize downloaded Schumacher battery charger manuals, a compatible PDF reader is essential. The universally recognized standard is Adobe Acrobat Reader, available as a free download for Windows, macOS, and Android devices. This software ensures accurate rendering of the manual’s formatting, including diagrams and troubleshooting steps for models like the SE-2001, SE-3000, and beyond.

However, Adobe Acrobat Reader isn’t the sole option. Numerous alternative PDF viewers, such as Foxit Reader or SumatraPDF, offer similar functionality. These alternatives can be beneficial if you prefer a lighter-weight application or have specific system requirements.

Regardless of your chosen reader, ensure it’s updated to the latest version for optimal performance and security. This guarantees compatibility with newer PDF features and protects against potential vulnerabilities.

Adobe Acrobat Reader – Free Download

Adobe Acrobat Reader stands as the gold standard for viewing, printing, signing, and annotating PDF documents, including Schumacher battery charger manuals for models such as the SE-4020, SE-4022, and SE-6030. Downloading this software is straightforward and completely free.

To obtain it, simply visit the official Adobe website and navigate to the Acrobat Reader download section. The installation process is user-friendly and typically completes within minutes. Once installed, you can seamlessly open and interact with all types of PDF content, including forms and manuals.

This software is crucial for correctly displaying the detailed diagrams and troubleshooting guides found within the Schumacher manuals, ensuring you can effectively maintain your charger, even the SE-8050 model.

Alternative PDF Viewers

While Adobe Acrobat Reader is the industry leader, several excellent alternative PDF viewers can access your Schumacher battery charger manuals, including those for the SE-2001 and SE-3000 models. These options provide similar functionality without the need for a full Adobe software suite.

Foxit Reader is a popular choice, known for its speed and lightweight design. SumatraPDF is another excellent, free option, particularly favored for its simplicity and minimal resource usage. Both viewers allow you to open, read, and print PDF files with ease.

These alternatives are beneficial if you encounter compatibility issues or prefer a different user interface. Regardless of your chosen viewer, ensuring you can properly display the manual’s information is vital for safe and effective charger operation, even for the SE-4020.

Troubleshooting Common Issues (Refer to Manual)

Encountering problems with your Schumacher battery charger, be it a SE-2001, SE-3000, or any other model, can be frustrating. However, many issues have straightforward solutions detailed within your charger’s manual. Always consult the manual first before attempting repairs.

Common problems include the charger failing to power on, a battery not receiving a charge, or the appearance of error codes. The manual provides specific troubleshooting steps for each scenario, often relating to connection polarity or voltage settings.

Understanding these error codes, specific to models like the SE-4020 and SE-6030, is crucial for diagnosing the root cause. Remember, attempting to fix issues without proper guidance can be dangerous; the manual is your primary resource for safe and effective troubleshooting;

Charger Not Turning On

If your Schumacher battery charger, whether it’s a SE-2001, SE-3000, or a more recent model like the SE-8050, fails to power on, several factors could be at play. First, verify the power cord is securely connected to both the charger and a functioning electrical outlet. Test the outlet with another device to confirm it’s providing power.

Next, check the charger’s internal fuse – the manual will detail its location and proper replacement procedure. Inspect the power switch itself for any damage or malfunction. A faulty switch may prevent the unit from receiving power.

Consult your charger’s PDF manual for model-specific troubleshooting steps. Ignoring these steps could lead to further damage or safety hazards. Remember, always disconnect the charger from the power source before inspecting internal components.

Battery Not Charging

Encountering a situation where your Schumacher charger isn’t charging the battery, regardless of the model (SE-2001, SE-4020, SE-6030, etc.), requires systematic troubleshooting. Initially, ensure the charger clamps are making a firm, clean connection to the battery terminals. Corrosion or loose connections are common culprits.

Verify correct polarity – red clamp to positive (+), black clamp to negative (-). Reversing polarity can damage both the charger and the battery. Confirm the battery isn’t already fully charged, as some chargers may not indicate a full charge.

Refer to your specific charger’s manual (available as a PDF download) for recommended charging times and voltage settings based on the battery type and capacity. A damaged battery may also prevent charging; testing the battery’s voltage is recommended.

Error Codes & Their Meanings

Schumacher battery chargers, including models SE-2001, SE-3000, SE-4020, and SE-8050, often utilize error codes to signal specific issues. These codes, detailed within your charger’s PDF manual, are crucial for accurate diagnosis. Ignoring these signals can lead to further damage or incorrect repairs.

Common error codes might indicate reversed polarity, a faulty battery, overvoltage, or internal charger malfunctions. The manual provides a comprehensive list, explaining each code’s meaning and suggested corrective actions. For example, a flashing light sequence could denote a battery sulfation issue.

Always consult the manual specific to your charger model, as error code definitions can vary. Downloading the PDF version ensures you have the most up-to-date information for effective troubleshooting and maintenance.

Safety Precautions (Important – See Manual)

Working with battery chargers and batteries presents inherent risks, making adherence to safety precautions paramount. The Schumacher charger manual, available as a PDF download, details critical safety guidelines for models SE-2001 through SE-8050. Ignoring these instructions could result in serious injury or property damage.

Key precautions include ensuring adequate ventilation during charging to prevent hydrogen gas buildup, which is explosive. Always wear appropriate eye protection and gloves when handling batteries, as battery acid is corrosive. Correct polarity connection – red to positive, black to negative – is vital to avoid sparking and potential explosions.

Never charge damaged batteries, and always disconnect the charger before removing the battery. Refer to the manual for specific warnings related to your charger model and battery type. Prioritize safety; the manual is your guide.

Proper Ventilation

Battery charging generates hydrogen gas, a highly flammable and potentially explosive byproduct. Therefore, adequate ventilation is absolutely crucial when using a Schumacher battery charger, regardless of the model – SE-2001, SE-3000, SE-4020, SE-4022, SE-6030, or SE-8050. Charging in a confined space significantly increases the risk of ignition.

Always charge batteries in a well-ventilated area, preferably outdoors or in a garage with open windows and doors. Avoid charging near sparks, flames, or other ignition sources. Ensure there is sufficient airflow to dissipate the hydrogen gas as it’s produced. The Schumacher manual PDF download provides detailed guidance on ventilation requirements for safe operation.

Failure to provide proper ventilation could lead to a dangerous accumulation of hydrogen gas, posing a severe safety hazard. Prioritize a well-ventilated charging environment.

Battery Acid Handling

Battery acid is a corrosive substance, capable of causing severe burns to skin and eyes. When working with batteries – whether charging with a Schumacher SE-2001, SE-3000, SE-4020, SE-4022, SE-6030, or SE-8050 – extreme caution is essential. Always wear appropriate personal protective equipment (PPE), including safety glasses and acid-resistant gloves.

If battery acid comes into contact with skin or eyes, immediately flush the affected area with copious amounts of water for at least 15 minutes and seek medical attention. Neutralize acid spills with baking soda and water. The Schumacher charger manual PDF download will detail specific safety procedures regarding battery acid.

Avoid contact with clothing, as acid can cause damage. Proper handling and disposal of battery acid are crucial for both personal safety and environmental responsibility.

Correct Polarity Connection

Establishing the correct polarity – positive (+) to positive and negative (-) to negative – is paramount when using a Schumacher battery charger, be it a SE-2001, SE-3000, SE-4020, SE-4022, SE-6030, or SE-8050 model. Reversing the polarity can cause significant damage to the battery, the charger, and potentially surrounding electrical systems.

Always double-check the markings on the battery and the charger leads before making any connections. Most batteries clearly indicate the positive and negative terminals. The Schumacher charger manual PDF download will visually demonstrate the correct connection procedure. Incorrect connections can lead to overheating, sparking, and even explosion.

Ensure a secure connection to prevent arcing. Prioritize safety and consult the manual if unsure about the polarity of your battery or charger setup.

Manual Revision Dates & Updates

Schumacher Electric Corp. periodically updates its battery charger manuals, including those for models SE-2001, SE-3000, SE-4020, SE-4022, SE-6030, and SE-8050, to reflect design changes, safety improvements, and new features. Identifying the manual version is crucial to ensure you’re referencing the most accurate information.

Typically, the revision date is located on the cover page or within the introductory section of the PDF manual. Checking for updated manuals is essential, especially if your charger is several years old. Outdated manuals may contain inaccurate instructions or fail to address specific issues with your model.

Regularly visit the official Schumacher Electric website or trusted manual databases like ManualsLib and ManualsOnline to verify you have the latest version. Staying current with manual updates enhances safety and optimizes charger performance.

Identifying Manual Version

Determining the version of your Schumacher battery charger manual – for models like SE-2001, SE-3000, SE-4020, SE-4022, SE-6030, or SE-8050 – is vital for accurate troubleshooting and safe operation. Look for a “Revision Date” or “Version Number” typically found on the manual’s cover page, in the footer, or within the introductory sections of the PDF document.

Often, the date is presented as month/day/year (e.g., 09-05-90, as seen in some Schumacher documentation). Pay close attention to this date, as it indicates when the manual was last updated. A more recent date signifies that the manual incorporates the latest changes and corrections.

If no explicit version number is present, compare the manual’s contents with information available on the Schumacher Electric website to confirm its accuracy.

Checking for Updated Manuals

Regularly verifying if an updated manual exists for your Schumacher charger (SE-2001, SE-3000, SE-4020, SE-4022, SE-6030, or SE-8050) is crucial, as manufacturers often release revisions to address errors, add new features, or enhance safety information. The official Schumacher Electric website is the primary source for the latest documentation.

Periodically visit the website’s support or downloads section and search for your specific model number. Compare the revision date of the online manual with the date on your current PDF copy. If the online version is newer, download and replace your existing manual.

Additionally, check third-party manual databases like ManualsLib and ManualsOnline, but always prioritize the official Schumacher source for accuracy and reliability.

Schumacher Electric Corp. Information

Schumacher Electric Corporation has a rich history in designing and manufacturing automotive battery chargers, jump starters, and related accessories. Founded on a commitment to quality and innovation, the company has become a trusted name for both professional mechanics and DIY enthusiasts. Their product line, including models like the SE-2001, SE-3000, SE-4020, SE-4022, SE-6030, and SE-8050, caters to a wide range of battery charging needs.

For direct support, contacting Schumacher Electric Corp. is straightforward. Visit their official website to find contact information, including phone numbers and email addresses. Their customer support team can assist with manual requests, troubleshooting, and product inquiries. Accessing reliable information directly from the source ensures you have the most accurate guidance for your Schumacher charger.

Company History & Background

Schumacher Electric Corporation boasts a long-standing legacy in the automotive tool and equipment industry, originating as Home Comfort Kraft in 1990. Initially focused on battery chargers for various applications, the company quickly gained recognition for its durable and reliable products. Over the decades, Schumacher expanded its offerings to include jump starters, battery maintainers, and other power-related solutions, serving both professional and consumer markets.

The company’s commitment to innovation led to the development of advanced charging technologies, catering to the evolving needs of modern vehicles. Models like the SE-2001, SE-3000, and subsequent series demonstrate this dedication. Schumacher’s consistent focus on quality and customer satisfaction has solidified its position as a leading brand in battery charging solutions, continually adapting to industry advancements.

Contacting Schumacher Support

For direct assistance with your Schumacher battery charger, or to inquire about manual availability – particularly for models SE-2001, SE-3000, SE-4020, SE-4022, SE-6030, and SE-8050 – reaching out to their support team is crucial. While specific contact details aren’t explicitly provided in readily available sources, Schumacher Electric Corporation generally offers customer service through various channels.

Typically, manufacturers provide support via phone, email, or a dedicated contact form on their official website. Exploring the “Contact Us” section of Schumacher’s website is the first step. Alternatively, searching online for “Schumacher Electric support” will yield current contact information. Having your charger’s model number handy will expedite the process, ensuring efficient assistance with any questions or concerns regarding operation or manuals.

honda cr v 2007 owners manual

This manual assists owners with operation‚ maintenance‚ and troubleshooting of the 2007 CR-V‚ covering all models and potential feature variations.

Purpose of the Manual

This Owner’s Manual is designed to provide you‚ the 2007 Honda CR-V owner‚ with a comprehensive understanding of your vehicle’s operation and maintenance. It details features‚ controls‚ and systems‚ ensuring safe and enjoyable driving. The manual explains how to utilize all aspects of the CR-V‚ from basic functions to advanced technologies‚ if equipped.

It also serves as a vital resource for routine maintenance schedules‚ fluid checks‚ and understanding warning lights. This document aims to help you maximize your vehicle’s performance and longevity. Remember that descriptions may include features not present on your specific CR-V model. Always consult this manual for guidance and refer to a qualified technician for complex repairs or concerns.

Vehicle Identification

Properly identifying your 2007 Honda CR-V is crucial for service‚ warranty claims‚ and obtaining the correct parts. Your vehicle is uniquely identified by several key numbers. The Vehicle Identification Number (VIN) is a 17-digit code typically found on the driver’s side dashboard‚ visible through the windshield.

Additionally‚ the VIN is located on the vehicle registration and insurance documents. The engine number and other identification markings may be required for specific maintenance or repair procedures. Refer to your vehicle’s documentation or a Honda dealership for assistance locating these numbers. Accurate identification ensures efficient service and correct component replacement.

Important Safety Information

Your safety and the safety of others are paramount when operating the 2007 Honda CR-V. This manual contains vital warnings and precautions. Always read and understand these before driving or performing any maintenance. Pay close attention to all safety labels on the vehicle itself.

Ignoring safety instructions can lead to serious injury or death. Key areas include proper seatbelt usage‚ child restraint systems‚ airbag system operation‚ and fluid handling. Never operate the vehicle under the influence of drugs or alcohol. Be aware of your surroundings and drive defensively. Regular vehicle maintenance is also a critical safety component.

Understanding Your Vehicle

Familiarize yourself with the CR-V’s components: dashboard‚ controls‚ and features. This section details the instrument panel‚ steering wheel‚ and seat adjustments.

Dashboard Symbols and Indicators

The 2007 Honda CR-V’s dashboard utilizes a variety of symbols and indicators to communicate vital vehicle information to the driver. Understanding these warnings is crucial for safe operation and preventative maintenance. Illuminated symbols generally indicate a system malfunction or the need for attention.

Common indicators include the check engine light‚ oil pressure warning‚ battery warning‚ brake system warning‚ and seat belt reminder. Other symbols relate to systems like the anti-lock braking system (ABS)‚ airbag system‚ and various fluid levels. Refer to the owner’s manual for a comprehensive explanation of each symbol’s meaning and the appropriate course of action when it illuminates. Ignoring warning lights can lead to more serious and costly repairs.

Instrument Panel Overview

The 2007 Honda CR-V’s instrument panel provides essential driving information at a glance. Centrally located is the speedometer‚ displaying vehicle speed in both miles and kilometers per hour. Adjacent to it‚ the tachometer indicates engine revolutions per minute (RPM). A multi-information display screen presents data like fuel level‚ coolant temperature‚ and trip odometer readings.

Warning lights and indicators‚ as detailed elsewhere in the manual‚ are also prominently featured. Controls for adjusting illumination and resetting trip meters are conveniently positioned. Familiarizing yourself with the instrument panel layout ensures quick and easy access to critical vehicle data during operation‚ enhancing both safety and driving enjoyment.

Steering Wheel Controls

The 2007 Honda CR-V’s steering wheel integrates several controls for enhanced convenience and safety while driving. These typically include audio system controls – volume‚ track selection‚ and radio station tuning – allowing adjustments without taking your hands off the wheel. Cruise control buttons maintain a set speed on highways‚ reducing driver fatigue.

Depending on the trim level‚ additional controls may be present‚ such as those for the navigation system or hands-free telephone operation. Understanding the location and function of each control is crucial for safe and efficient vehicle operation. Refer to the detailed diagrams within this manual for precise identification of each control’s purpose.

Seat Adjustments and Features

The 2007 Honda CR-V offers adjustable seating to ensure driver and passenger comfort and safety. Manual seat adjustments allow for fore/aft positioning‚ seat height‚ and backrest angle modification. Some models may include adjustable lumbar support for enhanced lower back comfort during longer drives.

Headrests are also adjustable‚ crucial for whiplash protection in the event of a collision. Power seat options‚ if equipped‚ provide effortless adjustment with conveniently located controls. Familiarize yourself with all adjustment features to achieve an optimal driving position‚ maximizing visibility and control. Proper seat positioning is vital for safe vehicle operation.

Operating Your Vehicle

This section details essential procedures for safely operating your 2007 CR-V‚ including starting‚ driving‚ fueling‚ and utilizing the braking system.

Starting and Stopping the Engine

Before starting your 2007 Honda CR-V‚ ensure the parking brake is engaged and the transmission is in Park (P). Insert the key into the ignition and turn it to the “II” position – this illuminates the dashboard indicators. Then‚ turn the key further to the “START” position and release it once the engine starts.

To stop the engine‚ shift the transmission into Park (P) and turn the ignition key to the “LOCK” position‚ removing the key. Always allow the engine to idle briefly before shutting it off‚ especially after vigorous driving. Familiarize yourself with these procedures for safe and efficient operation of your vehicle.

Driving Modes and Transmission

The 2007 Honda CR-V typically features a 5-speed automatic transmission. Select “D” for normal driving conditions. For enhanced engine braking when descending steep hills or towing‚ utilize the “D3” position‚ limiting the transmission to the first three gears.

The “2” position is suitable for challenging terrain like snow or ice‚ providing increased control. Manual shifting is also available via the gear selector; move the lever to the left and select “S” for sequential shifting. Remember to return the lever to “D” for automatic operation. Understanding these modes optimizes performance and safety.

Fueling and Fuel Specifications

The 2007 Honda CR-V requires unleaded gasoline with an octane rating of 87 or higher. Using lower octane fuel may cause engine knocking and reduced performance. The fuel tank capacity is approximately 15.3 gallons. Always ensure the fuel filler cap is securely tightened after refueling to prevent fuel vapor emissions.

Avoid overfilling the tank‚ as this can damage the fuel system. Refer to your vehicle’s fuel door for specific fuel grade recommendations. It’s crucial to use quality fuel to maintain optimal engine health and efficiency. Regularly check for fuel leaks and address them promptly for safety.

Braking System Operation

The 2007 Honda CR-V is equipped with a hydraulic braking system featuring ventilated front discs and solid rear discs. The Anti-lock Braking System (ABS) helps prevent wheel lockup during hard braking‚ enhancing steering control. Apply firm and steady pressure to the brake pedal for optimal stopping power.

Avoid abrupt or jerky braking unless in an emergency. Regularly inspect brake pads‚ rotors‚ and fluid levels for wear and damage. A properly maintained braking system is vital for safety. Be aware of increased stopping distances in wet or slippery conditions. Familiarize yourself with the ABS function and its operational characteristics.

Maintenance and Care

Regular maintenance‚ including fluid checks‚ tire care‚ and scheduled services‚ ensures your 2007 CR-V’s reliability and longevity on the road.

Scheduled Maintenance Services

Maintaining your 2007 Honda CR-V requires adherence to a specific maintenance schedule‚ detailed within the owner’s manual‚ to ensure optimal performance and longevity. These services encompass routine inspections‚ fluid replacements‚ and component adjustments. Key intervals include oil and filter changes‚ typically every 5‚000 to 7‚500 miles‚ depending on driving conditions.

Additionally‚ scheduled services address air filter replacement‚ coolant flushes‚ spark plug inspections‚ and brake system evaluations. Tire rotations are crucial for even wear‚ extending tire life and enhancing handling. Following the recommended schedule prevents potential issues‚ minimizes repair costs‚ and preserves the vehicle’s resale value. Consult the manual for a comprehensive list and specific mileage milestones.

Fluid Checks and Replacements

Regularly checking and replenishing fluids is vital for the 2007 Honda CR-V’s health. The owner’s manual details procedures for inspecting engine oil‚ coolant‚ brake fluid‚ power steering fluid‚ and windshield washer fluid. Low fluid levels can lead to component damage and reduced performance. Engine oil should be checked weekly‚ and replaced according to the maintenance schedule – typically every 5‚000-7‚500 miles.

Coolant levels should be maintained between the minimum and maximum marks‚ and flushed periodically. Brake fluid absorbs moisture‚ requiring periodic replacement. Proper fluid levels ensure optimal system operation and prevent costly repairs. Always use Honda-approved fluids for best results and consult the manual for specific fluid types and capacities.

Tire Information and Maintenance

The 2007 Honda CR-V owner’s manual emphasizes proper tire care for safety and longevity. It details the correct tire size and pressure‚ found on the vehicle’s doorjamb. Regularly checking tire pressure – when tires are cold – is crucial for even wear and optimal handling. The manual recommends rotating tires every 5‚000-7‚500 miles to promote uniform wear;

Inspect tires for damage‚ such as cuts or bulges‚ and replace them when tread depth reaches the minimum legal limit. Understanding load capacity and speed ratings is also important. Proper tire maintenance improves fuel efficiency and reduces the risk of blowouts. Always adhere to the recommended tire specifications outlined in the owner’s manual.

Battery Care and Jump Starting

The 2007 Honda CR-V owner’s manual provides guidance on maintaining the vehicle’s battery and safely jump-starting it if necessary. It advises keeping the battery terminals clean and free of corrosion to ensure optimal performance. Avoid leaving lights on or accessories running when the engine is off‚ as this can drain the battery.

If jump-starting is required‚ the manual details the correct procedure‚ emphasizing proper cable connection sequence – positive to positive‚ negative to ground. Incorrect connections can damage the electrical system. Disconnect any aftermarket accessories before attempting a jump start. Regularly check the battery’s condition and replace it when it no longer holds a charge.

Features and Systems

This section details the 2007 CR-V’s audio‚ climate control‚ navigation (if equipped)‚ and power window/lock systems for optimal vehicle enjoyment.

Audio System Operation

The 2007 Honda CR-V’s audio system provides entertainment through AM/FM radio‚ CD playback‚ and potentially an auxiliary input. Power the system on using the designated power button‚ and adjust the volume with the volume knob.

Station selection is achieved via the tuning knob or preset buttons. CD playback requires inserting a disc; controls for track selection and playback mode (repeat‚ random) are readily available. Explore the system’s settings for tone control (bass‚ treble) and balance/fader adjustments to personalize your listening experience.

Refer to the owner’s manual for specific details regarding your CR-V’s audio configuration‚ including any optional features like a premium sound system or subwoofer.

Climate Control System

The 2007 Honda CR-V’s climate control system offers heating‚ cooling‚ and ventilation for passenger comfort. Operation is typically managed through a combination of dials and buttons. Adjust the temperature using the temperature control knob‚ selecting desired heat or coolness.

Fan speed is controlled by a separate dial‚ allowing you to regulate airflow intensity. Select the desired airflow mode – face‚ feet‚ defrost‚ or a combination – using the mode control buttons.

The A/C button activates the air conditioning for cooling. Consult the owner’s manual for details on recirculation mode and any automatic climate control features present in your specific CR-V model.

Navigation System (If Equipped)

If your 2007 Honda CR-V is equipped with a navigation system‚ it provides turn-by-turn directions and points of interest. The system is operated through a touchscreen interface‚ allowing you to input destinations via address‚ point of interest‚ or previous locations.

Familiarize yourself with the map display‚ zoom controls‚ and route calculation functions; The owner’s manual details how to update map data‚ typically via CD or DVD.

Explore features like route options (fastest‚ shortest‚ etc.) and traffic avoidance (if supported).

Understand voice guidance settings and how to adjust volume.

Power Windows and Locks

The 2007 Honda CR-V features power windows and door locks for convenience and security. Window controls are located on each door panel‚ allowing individual operation of each window. A master switch on the driver’s door controls all windows‚ including a lockout feature to prevent rear passenger operation.

Power door locks are controlled by switches on each door and a central locking switch‚ typically near the driver’s seat.

The owner’s manual details the operation of the auto-up/down feature and any associated safety precautions.

Learn about the child safety lock function for rear doors.

Troubleshooting and Emergency Procedures

This section details responses to common warning lights‚ emergency situations‚ jump starting‚ and tire changes for the 2007 CR-V.

Common Warning Lights

Understanding the warning lights on your 2007 Honda CR-V’s instrument panel is crucial for identifying potential issues. The manual details each light’s meaning‚ ranging from minor maintenance reminders to critical system failures.

A lit “Check Engine” light indicates a problem with the engine or emissions system‚ requiring professional diagnosis. The “Oil Pressure” light signals low oil pressure‚ demanding immediate attention to prevent engine damage.

The “Battery” or “Charging System” light suggests an issue with the charging system‚ potentially caused by the alternator or battery itself. Other lights cover brake system malfunctions‚ low fuel levels‚ and seatbelt reminders.

Ignoring warning lights can lead to more significant and costly repairs‚ so prompt investigation is always recommended.

What to Do in an Emergency

The 2007 Honda CR-V owner’s manual provides vital guidance for handling emergency situations. In case of a breakdown‚ safely pull over to a level surface‚ activate hazard lights‚ and consider using warning devices like reflective triangles.

If involved in a collision‚ ensure the safety of all occupants‚ assess injuries‚ and contact emergency services immediately. The manual details procedures for reporting accidents and exchanging information with other parties.

For medical emergencies‚ administer first aid if trained and await professional help. The manual also outlines steps for jump-starting a dead battery and changing a flat tire‚ emphasizing safety precautions.

Knowing these procedures can significantly improve your response and minimize risks during unforeseen events.

Jump Starting Procedures

The 2007 Honda CR-V owner’s manual details a safe jump-starting process. First‚ position a functioning vehicle close enough for the jumper cables to reach‚ but avoid contact. Ensure both vehicles are switched off.

Connect the red (+) cable to the positive terminal of the discharged battery‚ then to the positive terminal of the good battery. Next‚ connect the black (-) cable to the negative terminal of the good battery‚ and finally‚ to a grounded metal surface on the CR-V‚ away from the battery.

Start the good vehicle‚ let it run for a few minutes‚ then attempt to start the CR-V. Disconnect cables in reverse order.

Tire Changing Instructions

The 2007 Honda CR-V owner’s manual provides detailed tire changing guidance. First‚ park on a level surface and engage the parking brake. Gather the spare tire‚ jack‚ and lug wrench. Loosen the lug nuts on the flat tire before jacking up the vehicle.

Consult the manual for correct jacking points to avoid damage. Raise the vehicle until the flat tire is off the ground. Fully remove the lug nuts and carefully pull the flat tire off the wheel studs. Mount the spare tire‚ hand-tighten the lug nuts‚ and lower the vehicle.

Finally‚ fully tighten the lug nuts in a star pattern.

Technical Specifications

This section details the 2007 CR-V’s engine specs‚ dimensions‚ fluid capacities‚ and towing capacity – crucial data for informed vehicle understanding.

Engine Specifications

The 2007 Honda CR-V primarily features a 2.4-liter‚ inline-4 cylinder engine‚ delivering a balance of power and fuel efficiency. This engine typically produces around 166 horsepower at 5‚800 rpm and 161 lb-ft of torque at 4‚000 rpm.

It utilizes a single overhead camshaft (SOHC) design with 16 valves and multi-point fuel injection. The compression ratio is approximately 9.7:1. Depending on the specific trim level and regional variations‚ some models might have slight differences in these specifications.

Regular unleaded gasoline with an octane rating of 87 is recommended for optimal performance. Understanding these engine details is vital for proper maintenance and maximizing the vehicle’s lifespan.

Dimensions and Capacities

The 2007 Honda CR-V boasts a length of approximately 178.0 inches‚ a width of 71.6 inches‚ and a height of 66.1 inches. Its wheelbase measures around 101.5 inches‚ contributing to a stable ride. Cargo capacity is a significant feature‚ offering 33.5 cubic feet behind the rear seats and expanding to 72.7 cubic feet with the rear seats folded down.

Fuel tank capacity is 15.3 gallons‚ and the CR-V’s curb weight typically ranges from 3‚384 to 3‚552 pounds‚ depending on the drivetrain (2WD or 4WD).

These dimensions and capacities are crucial for understanding the vehicle’s space utilization and overall practicality.

Fluid Capacities

Maintaining proper fluid levels is vital for the 2007 Honda CR-V’s performance. The engine oil capacity is approximately 4.2 US quarts (4.0 liters) with a filter change‚ utilizing 5W-20 oil. The cooling system requires roughly 1.6 gallons (6.1 liters) of Honda Long Life Antifreeze/Coolant Type 2.

Power steering fluid capacity is around 0.84 US quarts (0.8 liters) using Honda PSF-2 fluid. The automatic transmission needs approximately 3.3 US quarts (3.1 liters) of Honda ATF-Z1.

Brake fluid utilizes DOT 3‚ and the rear differential (if equipped) requires around 1.1 US quarts (1.0 liter) of gear oil.

Towing Capacity

The 2007 Honda CR-V’s towing capacity is rated at 1‚500 pounds (680 kg) when properly equipped with the optional towing package. This package includes a trailer hitch receiver and wiring harness. Exceeding this limit can compromise vehicle handling and safety.

Always distribute the load evenly within the trailer and ensure the total weight (trailer plus cargo) remains within the specified limit.

Proper trailer brakes are recommended‚ especially for heavier loads. Consult a qualified mechanic for installation and verification of the towing setup.

Warranty Information

This section details the 2007 CR-V’s warranty coverage‚ claim procedures‚ and provides essential information regarding vehicle repairs and component protection.

Warranty Coverage Details

The 2007 Honda CR-V’s warranty provides coverage for defects in materials or workmanship under normal use. This typically includes a bumper-to-bumper limited warranty for a specified period‚ often 3 years or 36‚000 miles‚ whichever comes first. Powertrain coverage‚ encompassing the engine‚ transmission‚ and drivetrain‚ usually extends longer – potentially 5 years or 60‚000 miles.

Separate warranties cover corrosion‚ emissions components‚ and accessories. Specific details regarding coverage duration and exclusions are outlined in the official warranty booklet provided with the vehicle. It’s crucial to review this document carefully to understand what is and isn’t protected. Maintaining proper vehicle maintenance‚ as outlined in the owner’s manual‚ is essential for warranty validity.

Warranty Claim Procedures

To initiate a warranty claim for your 2007 Honda CR-V‚ first contact an authorized Honda dealership. Schedule a service appointment and clearly explain the issue you’re experiencing. The dealership’s technicians will diagnose the problem and determine if it’s covered under warranty.

Provide your vehicle identification number (VIN) and the original purchase date. The dealership will submit the claim to Honda for approval. Keep detailed records of all communication‚ repair orders‚ and invoices. Honda may require inspection of the vehicle or components before authorizing repairs.

Warranty claims are subject to Honda’s approval process and may be denied if the issue isn’t covered or proper maintenance wasn’t performed.

stoeger m3000 manual

The Stoeger M3000 is a reliable, affordable semi-automatic shotgun designed for duck hunting and versatile applications. Built on an inertia-driven platform, it offers durability and excellent handling.

1.1 Overview of the Stoeger M3000 Shotgun

The Stoeger M3000 is a semi-automatic shotgun designed for reliability and versatility. Built on an inertia-driven system, it excels in various shooting applications, including waterfowl hunting, sport shooting, and home defense. Known for its durability and affordability, the M3000 is a popular choice among hunters and shooters who demand performance without compromising on value. Its robust design and ergonomic features make it easy to handle, while its proven inertia-driven action ensures consistent functionality. Whether for professional use or casual shooting, the M3000 is a dependable option that meets the needs of a wide range of shooters.

1.2 Importance of the Manual for Owners

The Stoeger M3000 manual is an essential resource for owners, providing detailed instructions for safe and effective operation. It covers assembly, disassembly, and maintenance procedures, ensuring optimal performance. The manual also includes troubleshooting tips for common issues like feeding problems or jamming. By following the guidelines, owners can prevent accidents and extend the shotgun’s lifespan. Whether for hunting, sport shooting, or home defense, the manual empowers users to maximize their M3000’s potential while adhering to safety standards. It is a crucial tool for both new and experienced shooters to understand and maintain their firearm properly.

Key Features of the Stoeger M3000

The Stoeger M3000 features an inertia-driven action system, ensuring reliable cycling and reduced maintenance. Its durable design and versatility make it suitable for various shooting applications, from hunting to defense.

2.1 Design and Build Quality

The Stoeger M3000 boasts a robust and durable design, featuring a lightweight aluminum receiver and a chrome-lined barrel for enhanced corrosion resistance. Its synthetic stock is weather-resistant and built to withstand harsh conditions, making it ideal for waterfowling and rugged use. The shotgun’s straightforward, no-frills construction ensures reliability and minimal maintenance, appealing to hunters and shooters who prioritize functionality over aesthetics. Its ergonomic design provides a comfortable grip and intuitive handling, ensuring smooth operation in various shooting scenarios.

2.2 Inertia-Driven Action System

The Stoeger M3000 utilizes a proven inertia-driven action system, ensuring reliable cycling with minimal moving parts. This system reduces maintenance and enhances durability, making it ideal for harsh environments like waterfowl hunting. The inertia-driven mechanism operates by storing kinetic energy during recoil, which is then used to eject the spent shell and chamber the next round. This simple yet effective design contributes to the shotgun’s lightweight feel and smooth operation, allowing for quick follow-up shots and consistent performance across various ammunition types.

2.3 Versatility for Different Shooting Applications

The Stoeger M3000 excels in various shooting scenarios, from waterfowl hunting to sport shooting and home defense. Its durable design and reliable inertia-driven system make it suitable for harsh environments and high-volume use. The shotgun’s lightweight and balanced feel allow for quick handling, while its ability to cycle a wide range of ammunition ensures versatility. Whether in the field or at the range, the M3000 adapts seamlessly to different roles, making it a practical choice for both novice and experienced shooters. Its no-frills approach ensures affordability without compromising performance.

Specifications of the Stoeger M3000

The Stoeger M3000 is a 12-gauge semi-automatic shotgun with a 3-inch chamber, available in various barrel lengths, and weighs approximately 7.5 pounds. It features a durable synthetic stock.

3.1 Gauge and Chamber Size

The Stoeger M3000 is chambered for 12-gauge ammunition, with a 3-inch chamber size, allowing it to handle a wide range of shotshell lengths, including 2¾”, 3″, and 3½” shells. This versatility makes it suitable for various shooting applications, from waterfowl hunting to home defense. The chamber is constructed from high-strength steel, ensuring durability and reliability when firing high-performance ammunition. The shotgun’s ability to cycle both light and heavy loads effortlessly is a testament to its robust design and inertia-driven system, making it a dependable choice for shooters of all levels.

3.2 Barrel Length and Weight

The Stoeger M3000 features a durable barrel available in lengths of 24″, 26″, 28″, and 30″, catering to various shooting needs. Weighing approximately 7.4 pounds, the shotgun balances portability with stability, making it easy to handle in the field. The barrel’s satin finish resists corrosion and wear, ensuring long-term reliability. Its lightweight design, combined with a well-balanced barrel, reduces recoil and enhances accuracy, making it ideal for both hunting and sport shooting applications. The barrel’s construction and length options ensure versatility for different shooting scenarios, from tight quarters to open fields.

3.4 Stock and Ergonomic Features

The Stoeger M3000 features a durable, weather-resistant synthetic stock designed for comfort and reliability in harsh conditions. The stock’s ergonomic design provides a secure grip and intuitive mounting, reducing recoil impact. Its pistol grip and textured forearm enhance control, even in wet or muddy environments. The shotgun’s balanced design ensures smooth handling, making it suitable for extended use in the field or at the range. These ergonomic features contribute to improved accuracy and shooter confidence, catering to both experienced and novice users.

Operating the Stoeger M3000

The Stoeger M3000 operates on a reliable inertia-driven system, ensuring smooth cycling and consistent performance. Its straightforward design makes it easy to handle and maintain, ideal for various shooting applications.

4.1 Loading and Unloading Procedures

Always ensure the shotgun is unloaded before handling. To load, first remove the magazine cap and insert shells into the magazine tube. The Stoeger M3000 accepts up to three 2;75″ or 3″ shells. Push the bolt forward to chamber a round. For unloading, remove the shell from the chamber and extract shells from the magazine. Always follow safety guidelines and ensure the muzzle is pointed in a safe direction during these procedures. Proper loading and unloading ensure safe and reliable operation of the shotgun.

4;2 Safety Mechanisms and Precautions

The Stoeger M3000 features a trigger safety mechanism that prevents accidental discharge. Always keep the muzzle pointed in a safe direction and ensure the shotgun is unloaded when not in use. Store the firearm in a secure location, out of reach of children. Avoid tampering with the safety mechanism, as this can compromise its function. Always wear eye and ear protection when shooting. Follow all local laws and regulations regarding firearm safety. Proper handling and adherence to safety guidelines ensure a safe and enjoyable shooting experience with the Stoeger M3000.

4.3 Proper Shooting Techniques

Proper shooting techniques with the Stoeger M3000 ensure accuracy and control. Stand with a balanced stance, grip the shotgun firmly, and align the barrel with your target. Keep your eyes focused on the target and maintain consistent cheek-to-stock placement. The inertia-driven system minimizes recoil, allowing for quicker follow-up shots. Practice smooth, controlled movements when swinging on moving targets. Always ensure the shotgun is properly shouldered and aligned before firing. Regular practice and adherence to these techniques will enhance your shooting performance in various applications, from hunting to sport shooting.

Maintenance and Cleaning

Regular cleaning of the barrel and chamber is essential for the Stoeger M3000. Lubricate moving parts to ensure smooth operation. Store properly to prevent rust and maintain reliability.

5.1 Cleaning the Barrel and Chamber

Regularly clean the Stoeger M3000’s barrel and chamber to maintain performance. Use a cleaning rod and brush to remove residue. Apply a solvent, then patch through the barrel until clean. Wipe the chamber and bolt face. Lightly lubricate moving parts after cleaning. Always ensure the barrel is dry before storage to prevent rust. Proper cleaning ensures reliability and longevity, especially after exposure to harsh environments like waterfowl hunting. Follow the manual’s detailed instructions for best results.

5.2 Lubrication Points and Recommendations

Proper lubrication is essential for the Stoeger M3000’s smooth operation. Apply a high-quality gun oil to the bolt, action bars, and trigger mechanism. Avoid over-lubrication, as it can attract dirt; Use a clean, lint-free cloth to wipe off excess oil. Lubricate after cleaning or every 100 rounds. Pay special attention to moving parts exposed to harsh conditions. Regular lubrication ensures the inertia-driven system functions reliably and reduces wear. Refer to the manual for specific lubrication points and recommended products to maintain optimal performance and extend the shotgun’s lifespan.

5.3 Storage and Protection Tips

Store the Stoeger M3000 in a dry, cool place to prevent rust and corrosion. Use a protective case or gun safe to shield it from dust and unauthorized access. Avoid extreme temperatures and humidity. Clean and lubricate the shotgun before storage to maintain its condition. Consider using desiccants or silica gel packets to absorb moisture. For added protection, use a gun sock or silicone cloth to prevent scratches. Always store the shotgun unloaded, with the action open, to ensure safety and prevent accidental discharge. Regularly inspect stored firearms to ensure they remain in good condition.

Troubleshooting Common Issues

The Stoeger M3000 may experience issues like failure to feed, jamming, or trigger malfunctions. Regular cleaning, proper lubrication, and inspecting parts can often resolve these problems effectively.

6.1 Failure to Feed or Eject

Failure to feed or eject in the Stoeger M3000 can occur due to improper assembly, insufficient lubrication, or debris in the action. Ensure the magazine tube is securely attached and the bolt assembly is clean. Check for obstructions in the chamber or barrel. If issues persist, refer to the manual for disassembly instructions to inspect the firing pin and trigger group. Proper lubrication of moving parts and regular cleaning can prevent such malfunctions. Always follow the manufacturer’s guidelines for maintenance and repair to ensure reliable operation.

6.2 Jamming and Stuck Shells

Jamming and stuck shells in the Stoeger M3000 often result from insufficient lubrication, debris, or improper assembly. Clean the chamber and barrel regularly to remove residue. Ensure the magazine tube is securely attached and the bolt assembly is free from obstructions. If a shell becomes stuck, avoid forcing it out, as this can damage the firearm. Instead, follow the manual’s disassembly instructions to safely remove the shell. Proper lubrication of moving parts and regular maintenance can help prevent such issues. Always inspect the firearm after cleaning to ensure smooth operation.

6.3 Trigger and Safety Malfunctions

Trigger and safety malfunctions in the Stoeger M3000 can occur due to dirt, improper lubrication, or wear. If the trigger fails to reset, ensure the bolt assembly is clean and properly lubricated. For safety issues, check that the safety lever moves smoothly and is free from debris. Avoid attempting DIY repairs, as this can void the warranty or cause further damage. Refer to the official Stoeger M3000 manual for disassembly instructions or contact an authorized service center for professional assistance. Regular maintenance and inspection can prevent such malfunctions.

Accessories and Upgrades

The Stoeger M3000 offers a range of accessories, including Weaver scope bases, magazine tube caps, and choke tubes, to enhance performance and customization for various shooting needs.

7;1 Scope and Optic Mounts

The Stoeger M3000 supports various optic mounts, including Weaver scope bases, for easy installation of scopes, red dot sights, or reflex sights. These mounts provide a secure platform for optics, enhancing accuracy and versatility. Designed for durability, they withstand harsh field conditions, making them ideal for hunters and shooters. The Weaver system allows quick attachment of accessories, ensuring reliable performance. Whether for target shooting or hunting, optic mounts expand the shotgun’s capabilities, offering improved precision and adaptability to different shooting scenarios.

7.2 Slings and Sling Attachments

The Stoeger M3000 can be equipped with slings and sling attachments for enhanced portability and control. Tactical slings or padded slings are popular choices, offering comfort during extended use. Sling attachments, such as swivel studs or QD (Quick Detach) mounts, allow easy installation. These accessories are durable and designed to withstand rigorous field conditions. Slings are particularly useful for hunters or shooters who need to carry the shotgun over long distances. They improve stability and reduce fatigue, making the M3000 more versatile for various shooting applications and environments.

7.3 Choke Tubes and Patterns

The Stoeger M3000 comes with interchangeable choke tubes, allowing shooters to adapt to various shooting conditions. Common choke options include Improved Cylinder, Modified, and Full, each delivering distinct shot patterns. The choke system enhances performance for tasks like waterfowl hunting, upland game, or target shooting. High-quality choke tubes are durable and easy to install, ensuring optimal versatility. Proper selection of choke tubes can improve accuracy and effectiveness, making the M3000 a reliable choice for diverse shooting applications. Regular maintenance of choke tubes is recommended to maintain consistent performance.

Safety Precautions

Always wear eye and ear protection when shooting. Keep the shotgun unloaded when not in use and store it securely to prevent unauthorized access. Ensure the safety is engaged until ready to fire, and never point the muzzle at people or objects. Regularly inspect the firearm for damage or wear. Follow all local laws and regulations for safe handling and storage of firearms.

8.1 General Safety Guidelines

Always handle the Stoeger M3000 with care, ensuring the muzzle points in a safe direction. Wear eye and ear protection during use. Keep fingers off the trigger until ready to shoot. Store the shotgun unloaded, with the action open, in a secure location inaccessible to children. Regularly inspect the firearm for damage or wear. Use only authorized ammunition that matches the chamber size. Never modify the shotgun without professional guidance. Follow all local laws and regulations regarding firearm ownership and use. Proper safety habits ensure a safe and enjoyable shooting experience.

8.2 Handling and Storage Safety

Always treat the Stoeger M3000 as if it were loaded. Use a sturdy, padded case for transportation to prevent damage or accidental discharge. Store the shotgun in a cool, dry place, away from direct sunlight and humidity. Keep it in a locked gun safe or cabinet to prevent unauthorized access. Ensure the action is open and the magazine is empty during storage. Never store loaded shells in the same compartment as the firearm. Regularly inspect storage conditions to maintain the shotgun’s integrity and safety. Proper handling and storage practices help prevent accidents and extend the firearm’s lifespan.

8.3 Child and Unauthorized Access Prevention

To prevent unauthorized access, store the Stoeger M3000 in a locked gun safe or cabinet. Use trigger locks or cable locks to further secure the firearm. Keep keys or combinations confidential and out of reach of children. Educate children about firearm safety and the importance of not handling guns without adult supervision. Always ensure the shotgun is unloaded before storing it. Regularly inspect storage security to prevent tampering. These measures help protect against accidental discharge and unauthorized use, ensuring a safer environment for everyone.

Warranty and Customer Support

The Stoeger M3000 is backed by a comprehensive warranty covering defects in materials and workmanship. For inquiries or repairs, contact Stoeger Industries directly or visit authorized service centers.

9.1 Warranty Coverage and Duration

The Stoeger M3000 is covered by a comprehensive warranty that protects against defects in materials and workmanship. The warranty period typically lasts for five years from the date of purchase, ensuring owners have peace of mind. This coverage is non-transferable and applies to the original purchaser only. It does not cover normal wear and tear or damage caused by improper use or maintenance. For specific details, refer to the official Stoeger M3000 manual or visit the manufacturer’s website; Contact Stoeger Industries directly for any warranty-related inquiries or claims.

9.2 Contacting Stoeger Industries

For inquiries, warranty claims, or support, owners can contact Stoeger Industries through their official website or customer service channels. Visit https://stoegerindustries.com for detailed contact information, including phone numbers, email addresses, and mailing options. The website also provides access to downloadable manuals, parts diagrams, and repair resources. Customer service representatives are available to assist with troubleshooting, repair requests, and general questions about the Stoeger M3000. Ensure to have your shotgun’s serial number and purchase details ready for efficient support. Refer to the manual for specific contact guidelines and regional support options.

9.3 Service Centers and Repair Options

Stoeger Industries offers authorized service centers for professional repair and maintenance of the M3000. Owners can locate these centers through the official Stoeger website or by contacting customer support. Repairs should only be performed by authorized technicians to ensure warranty validity and maintain performance. For non-warranty repairs, owners can request service through local dealers or by shipping the shotgun directly to a Stoeger-authorized facility. Always use genuine Stoeger parts for repairs to guarantee reliability and safety. Refer to the manual for specific instructions on handling and shipping your firearm for service.

Parts Diagram and Assembly

The Stoeger M3000 parts diagram provides a detailed overview of components, aiding in assembly, disassembly, and maintenance. It ensures proper understanding and safe handling of the firearm.

10.1 Major Components Overview

The Stoeger M3000 consists of key components essential for its operation. The barrel and chamber handle ammunition firing, while the magazine tube stores shells. The bolt assembly and firing pin ensure reliable ignition. The trigger group controls the firing mechanism, and the stock provides ergonomic support. Understanding these parts is crucial for maintenance, disassembly, and proper functionality. This overview helps owners identify and manage each component effectively, ensuring safe and efficient use of the shotgun.

10.2 Bolt Assembly and Function

The bolt assembly is a critical component of the Stoeger M3000, responsible for chambering shells and ensuring reliable firing. It operates on an inertia-driven system, cycling smoothly during recoil. The assembly includes the bolt head, firing pin, and extractor, which work together to eject spent shells and load new rounds. Proper lubrication and inspection of the bolt assembly are essential to maintain its functionality. Regular maintenance prevents malfunctions and ensures consistent performance, making it a key focus for owners seeking optimal shotgun operation.

10.3 Trigger Group and Mechanism

The trigger group of the Stoeger M3000 is designed for smooth, consistent performance. It includes the trigger, hammer, and safety mechanism, ensuring reliable firing and safe operation. The trigger mechanism interacts with the bolt assembly and firing pin to cycle the shotgun. Proper maintenance, such as light lubrication, is essential to prevent wear and ensure smooth functionality. The trigger group is durable and designed to withstand heavy use, making it a key component for both hunting and defensive applications. Regular inspection and cleaning are recommended to maintain optimal performance and reliability.

Disassembly and Reassembly

The Stoeger M3000 disassembly involves removing the barrel, magazine tube, bolt assembly, and trigger group. Reassembly follows reverse steps, ensuring all parts align properly for optimal function.

11.1 Removing the Barrel and Magazine Tube

To remove the barrel and magazine tube on the Stoeger M3000, start by unscrewing the magazine cap. Pull the magazine tube away from the barrel. Next, detach the barrel from the receiver by loosening the barrel nut. Ensure the action is open and the shotgun is unloaded. Use a wrench if necessary. Carefully lift the barrel off the receiver. Store all components safely. Always follow the manual’s instructions for proper disassembly to avoid damage. This process is essential for maintenance and ensures the shotgun functions correctly after reassembly.

11.2 Accessing the Bolt and Firing Pin

After removing the barrel, pull the charging handle to access the bolt assembly. Carefully lift the bolt out of the receiver. To access the firing pin, remove the bolt from the carrier. Use a punch to push out the firing pin retainer, then extract the firing pin. Be cautious of springs under tension. This step is crucial for detailed cleaning or repair. Always refer to the manual for precise instructions to avoid damaging components. Proper reassembly ensures the shotgun functions reliably.

11.3 Reassembling the Shotgun

Reassembly begins by replacing the bolt assembly into the receiver, ensuring it aligns properly. Reattach the barrel by inserting it into the receiver and securing it with the magazine tube cap. Tighten the cap firmly but avoid over-tightening. Next, reinstall the trigger group by aligning the pins and gently pushing it into place. Use a punch to ensure the firing pin retainer is secure. Finally, reattach the stock and forearm, ensuring all components are tightly fitted. Double-check all parts for proper alignment and function before test-firing the shotgun.

User Manual Download and Resources

Download the official Stoeger M3000 Manual PDF for detailed instructions. Additional guides and tutorials are available online, along with community forums for troubleshooting and expert advice.

12.1 Official Stoeger M3000 Manual PDF

The official Stoeger M3000 Manual PDF is a comprehensive guide covering operation, maintenance, and troubleshooting. It includes detailed diagrams and instructions for models like the M3000, M3000 Compact, and M3000 Sporting. Available for download from Stoeger’s official website, this manual ensures proper usage and care. It also provides step-by-step disassembly and assembly procedures, making it essential for both new and experienced owners. Additional resources, such as tutorials and community forums, complement the manual for enhanced support.

12.2 Additional Guides and Tutorials

Beyond the official manual, additional guides and tutorials offer in-depth insights for Stoeger M3000 owners. Video tutorials provide step-by-step instructions for disassembly, cleaning, and maintenance. Online forums and communities share user experiences, tips, and troubleshooting solutions. Specialized guides focus on optimizing performance for specific uses, such as waterfowl hunting or home defense. These resources complement the manual, ensuring owners maximize their shotgun’s potential. They also cover accessories like scopes and slings, helping users customize their M3000 for precise needs. Whether for beginners or seasoned shooters, these guides enhance overall ownership experience.

12.3 Online Communities and Forums

Online communities and forums dedicated to the Stoeger M3000 provide valuable platforms for owners to share experiences, ask questions, and gain insights. Websites like Reddit and specialized hunting forums host discussions on modifications, troubleshooting, and best practices. Enthusiasts often post detailed reviews, tips, and photos of their M3000 setups. These communities foster camaraderie and offer real-time advice, making them indispensable resources for both new and experienced shooters. They also serve as hubs for discovering accessories and upgrades, helping owners optimize their shotgun for specific needs. Engaging with these forums enhances the overall ownership experience.

irritrol slim dial owners manual

The Irritrol Slim Dial owner’s manual is essential for understanding your timer’s operation, ensuring reliability, and troubleshooting issues. It provides guidance on programming, maintenance, and optimal performance.

Brief Overview of the Irritrol Slim Dial

The Irritrol Slim Dial is a popular lawn sprinkler timer designed for efficient water management. Known for its user-friendly interface, it allows homeowners to schedule watering cycles with ease. The timer features a compact design, making it ideal for various irrigation systems. However, some users have reported issues like time loss, highlighting the need for proper maintenance. The Slim Dial is compatible with older systems, but upgrading may require adjustments to solenoids or master switches. Its manual mode and programming options provide flexibility, while error codes help in troubleshooting. Despite its reliability, compatibility with newer systems can be a challenge. Regular maintenance, as outlined in the manual, ensures optimal performance and extends its lifespan.

Importance of the Owner’s Manual

The owner’s manual for the Irritrol Slim Dial is a vital resource for users, providing detailed instructions for installation, programming, and troubleshooting. It helps users understand the timer’s features, such as manual mode operations and custom programming, ensuring optimal performance. The manual also includes guidance on maintenance, like winterizing the system and replacing parts, which is crucial for extending the product’s lifespan. Additionally, it offers insights into compatibility issues with newer systems, helping users avoid potential problems during upgrades. By following the manual, users can resolve common issues, interpret error codes, and adjust settings for seasonal watering needs. It serves as a comprehensive guide, empowering users to maximize their irrigation system’s efficiency and reliability.

Product Overview

The Irritrol Slim Dial is a user-friendly, compact irrigation timer designed for durability and efficiency. It offers flexible programming options and reliable operation for residential and small commercial systems.

Key Features of the Irritrol Slim Dial

The Irritrol Slim Dial is known for its user-friendly interface, offering easy navigation and programming. It features a compact design, making it ideal for various installation settings. The timer includes multiple programming options, such as manual mode and custom schedules, allowing users to tailor watering cycles to specific needs. It also supports seasonal adjustments, ensuring efficient water usage throughout the year. The Slim Dial is compatible with a range of irrigation systems and is built for durability, providing reliable performance over time. Its intuitive controls and robust features make it a popular choice for both residential and small commercial applications, ensuring precise and efficient irrigation management.

Model Variations and Specifications

The Irritrol Slim Dial is available in several models, each designed to meet specific irrigation needs. The most common models include the 1000, 2000, and 4000 series, varying in the number of zones they support, from 4 to 16 zones. These models are compact, lightweight, and designed for easy installation. They operate on low voltage, typically 24V AC, ensuring safe and efficient performance. The Slim Dial series is known for its durability and weather-resistant design, making it suitable for outdoor use. Each model comes with detailed specifications in the owner’s manual, outlining zone capacity, voltage requirements, and compatibility with various irrigation systems. Understanding these specifications is crucial for selecting the right model and ensuring proper functionality.

Installation

The Irritrol Slim Dial installation requires careful planning to ensure compatibility with existing systems. Follow the manual’s guidelines to avoid common issues and ensure smooth operation effectively.

Step-by-Step Installation Guide

Proper installation of the Irritrol Slim Dial is crucial for optimal performance. Begin by preparing the site, ensuring all necessary tools and materials are available. Mount the controller securely, following the manual’s guidelines for placement and leveling. Connect the wires carefully, matching each zone wire to the corresponding terminal. Double-check all connections to avoid short circuits or misconfigurations. Once wired, test the system by running a manual cycle to ensure all zones activate correctly. If upgrading, verify compatibility with existing solenoids and valves, as older units may require adjustments. Finally, review the manual to ensure all safety precautions and best practices are followed for a smooth and reliable setup.

Wiring and Connectivity Instructions

Proper wiring is essential for the Irritrol Slim Dial’s functionality. Begin by ensuring all wires are matched correctly to their respective terminals, following the manual’s wiring diagram. For older models, verify trigger voltages to avoid compatibility issues with newer systems. If upgrading, consider replacing solenoids or master switches to ensure compatibility. Carefully cut the zip tie securing the cable to the DB-15 plug and remove any unnecessary wires from the setup. Zone terminals should only include the small, silver, stranded wires. After wiring, test the system by running a manual cycle to confirm all zones activate properly. Always follow safety guidelines to prevent damage or electrical hazards. Proper connectivity ensures reliable operation and prevents future issues.

Zone Setup and Configuration

Setting up zones on the Irritrol Slim Dial involves assigning each zone to a specific terminal and configuring its operation. Start by ensuring all wires are correctly connected to their respective terminals, as outlined in the manual. For older models, verify that trigger voltages match your system to avoid compatibility issues. Remove any unnecessary wires from the DB-15 plug setup, as only the small, silver, stranded wires should remain in the zone terminals. Once wired, use the controller to assign each zone and set its operation parameters. Test each zone individually to ensure proper activation. Proper zone configuration ensures efficient watering schedules and prevents system malfunctions. Always refer to the manual for specific instructions tailored to your model.

Programming

Programming the Irritrol Slim Dial involves setting the clock, creating custom schedules, and adjusting for seasonal needs. Follow the manual for optimal setup and operation.

Setting the Clock and Date

Setting the clock and date on your Irritrol Slim Dial is a straightforward process. Start by pressing the SET button to access the time setup menu. Use the UP and DOWN arrows to adjust the hour and minutes. Once the correct time is displayed, press SET again to save. Next, set the date by scrolling through the month, day, and year using the same arrows. Ensure the time zone is correctly selected to avoid scheduling conflicts. After confirming the date, press SET to finalize. Double-check the settings to ensure accuracy. Properly setting the clock and date is crucial for reliable operation and scheduling of your irrigation system. Additionally, consider adjusting for daylight saving time if applicable.

Understanding Manual Mode Operations

Manual mode on the Irritrol Slim Dial allows you to control your irrigation system without relying on programmed schedules. This feature is ideal for testing zones or providing immediate watering. To activate manual mode, press and hold the MANUAL button until the display indicates manual operation. Use the UP and DOWN arrows to select the desired zone. Once selected, press the MANUAL button again to start watering. You can adjust the watering time using the arrows or let it run until manually stopped. This mode is useful for troubleshooting or seasonal adjustments. Remember, manual mode does not override programmed schedules, ensuring your automated watering plan remains intact. Always return to automatic mode after manual operation to maintain your irrigation schedule.

Creating Custom Programs

Creating custom programs on the Irritrol Slim Dial allows you to tailor watering schedules to your lawn’s specific needs. Start by pressing the PROGRAM button to access the programming menu. Use the UP and DOWN arrows to set the start time, duration, and frequency of watering for each zone. You can program up to 4 start times per day and customize the watering duration in minutes. Once settings are adjusted, press the MANUAL button to save and exit. Custom programs ensure efficient water usage and adapt to seasonal changes. For complex schedules, consider dividing zones into separate programs. Always review your settings to avoid conflicts and ensure proper irrigation coverage. This feature is ideal for lawns with varying water requirements across different zones.

Adjusting for Seasonal Watering Needs

Adjusting the Irritrol Slim Dial for seasonal watering needs ensures optimal water usage and plant health. During warmer months, increase watering frequency and duration, while reducing it in cooler seasons. Access the PROGRAM menu to modify start times, zone durations, and intervals. Use the UP and DOWN arrows to adjust settings. For drought conditions, shorten watering times but maintain frequency. In rainy periods, extend intervals or pause watering. Monitor weather patterns to avoid overwatering. Seasonal adjustments can be made manually or by creating new custom programs. Regularly review and update settings to match changing conditions. This feature helps conserve water and keeps your lawn healthy year-round. Always save changes to ensure your settings take effect. Proper seasonal adjustments enhance the efficiency of your irrigation system.

Troubleshooting

Troubleshooting the Irritrol Slim Dial involves identifying common issues like timer inaccuracies or wiring problems. Check power supply, battery, and connections. Address zone malfunctions by inspecting solenoids and valves. Refer to error codes for specific solutions and perform advanced diagnostics if needed. Regular maintenance and inspections can prevent many issues. Always consult the manual for detailed guidance on resolving specific problems. Proper troubleshooting ensures your irrigation system operates efficiently and reliably.

Common Issues and Solutions

Common issues with the Irritrol Slim Dial include timer inaccuracies, wiring problems, and zone malfunctions. If the timer loses time, check the power supply and battery. For wiring issues, inspect connections and ensure solenoids are functioning properly. Zone problems may stem from faulty solenoids or clogged valves. Error codes provide specific guidance for troubleshooting. If upgrading, compatibility issues may arise, requiring adjustments to master switches or solenoids. Regular maintenance, such as cleaning valves and inspecting wires, can prevent many issues. Always refer to the manual for detailed solutions and ensure proper setup to avoid recurring problems. Addressing these common issues ensures optimal performance and extends the lifespan of your irrigation system.

Understanding Error Codes

Understanding error codes on the Irritrol Slim Dial is crucial for diagnosing and resolving issues efficiently. Error codes provide specific insights into system malfunctions, such as wiring problems, solenoid failures, or power supply issues. Common codes include those related to zone activation failures or communication errors between components. Referencing the owner’s manual is essential, as it deciphers each code and offers step-by-step solutions. For example, a code indicating low voltage may require checking the power source or replacing the battery. Advanced codes might signal the need for professional assistance or part replacements. Familiarizing yourself with these codes ensures timely fixes and prevents further damage to the system. Regular maintenance can often prevent errors from occurring in the first place.

Advanced Troubleshooting Techniques

Advanced troubleshooting for the Irritrol Slim Dial involves diagnosing complex issues beyond basic error codes. Start by checking the wiring configuration and ensuring all connections are secure. If the timer loses time, inspect the power supply and battery health. For zones not activating, test solenoid resistance using a multimeter to identify faulty valves. If upgrading, ensure compatibility with newer systems, as older units may have different trigger voltages. Consider replacing the master switch or solenoids if necessary. For persistent issues, consult the owner’s manual or contact a professional. Advanced techniques require a deeper understanding of the system’s electrical and mechanical components. Regular maintenance and upgrades can prevent many of these issues from arising.

Maintenance

Regular maintenance ensures optimal performance. Clean the controller, inspect wires, and replace worn parts. Winterize the system seasonally to prevent damage. Schedule regular checks to maintain efficiency.

Regular Maintenance Tips

Regular maintenance is crucial for the longevity and efficiency of your Irritrol Slim Dial. Start by cleaning the controller to remove dirt and debris that may interfere with its operation. Inspect all wires and connections for signs of wear or damage, ensuring they are secure and functioning properly. Check the solenoids and valves for proper operation, as faulty components can disrupt watering schedules. Additionally, winterizing the system is essential to prevent freezing and damage during colder months. Replace any worn or corroded parts promptly to maintain performance. Schedule routine checks to ensure all zones are watering correctly and adjust settings as needed. Regular upkeep helps prevent issues and ensures your irrigation system runs smoothly year-round.

Winterizing the Irritrol Slim Dial

Winterizing your Irritrol Slim Dial is essential to protect it from freezing temperatures and ensure optimal performance when spring arrives. Start by disconnecting the power source and draining any water from the system to prevent ice damage. Insulate exposed wires and components to shield them from cold conditions. If you live in an area with harsh winters, consider installing a freeze sensor or using a protective cover for the controller. Additionally, check for any leaks or worn parts before the winter season begins, as these can worsen with freezing temperatures. Proper winterization not only safeguards your irrigation system but also ensures it remains reliable and ready for use in the upcoming seasons.

Replacing Worn or Damaged Parts

Replacing worn or damaged parts on your Irritrol Slim Dial is crucial for maintaining its performance and longevity. Start by identifying the faulty components, such as solenoids, diaphragms, or wires, and ensure you use genuine Irritrol replacement parts for compatibility. Before making any repairs, turn off the power supply to the controller and drain the system to prevent water damage. For solenoid replacement, remove the old one from the valve and install the new one, ensuring proper wiring connections. Diaphragm replacements may require disassembling the valve, so refer to the manual for specific instructions. After replacing any part, test the system to ensure it operates correctly. Regular inspections and timely replacements can prevent major issues and keep your irrigation system running smoothly.

Replacement

Replacing your Irritrol Slim Dial timer ensures compatibility with newer systems and avoids voltage mismatches. Consider upgrading for reliability or when older parts are no longer supported.

When to Consider Upgrading

Consider upgrading your Irritrol Slim Dial timer if it loses time consistently, such as 7 minutes per week, or if it becomes incompatible with newer systems. Older units may have outdated trigger voltages, requiring either a replacement with a used unit or upgrading your master switch and solenoids. If reliability is a concern or if newer features are desired, upgrading to a modern timer is advisable. This ensures better performance and compatibility with current irrigation systems. Upgrading can also prevent future issues related to outdated technology. Assess your needs and system requirements before deciding to upgrade for optimal results.

Compatibility with Newer Systems

The Irritrol Slim Dial timer may face compatibility issues with newer irrigation systems due to outdated technology. Older units often have different trigger voltages, which can cause incompatibility with modern solenoids or master switches. If upgrading, ensure the new timer matches your system’s voltage requirements. Using a newer timer with older components may require additional adjustments or replacements. Compatibility is crucial for seamless operation, so check the specifications of both the timer and your irrigation system. If unsure, consult a professional to avoid potential issues. Proper compatibility ensures efficient and reliable performance, making it essential to verify before installation or upgrading.

Step-by-Step Replacement Process

To replace the Irritrol Slim Dial timer, start by turning off the power to the irrigation system. Disconnect the wires from the old timer, carefully labeling them for reconnection. Remove the old unit and install the new timer in its place. Reconnect the wires according to the labels, ensuring proper alignment with the terminal screws. Double-check all connections for accuracy. Turn the power back on and test the system to ensure it operates correctly. If upgrading, verify compatibility with newer components, as older timers may require adjustments or additional parts. Follow the manufacturer’s instructions for any specific installation requirements. Proper installation ensures reliable performance and prevents potential issues.

FAQs

Frequently asked questions about the Irritrol Slim Dial include troubleshooting common issues, understanding error codes, and programming custom schedules. Users often inquire about compatibility with newer systems and replacement options.

General Questions About the Irritrol Slim Dial

Common questions about the Irritrol Slim Dial often revolve around its reliability, compatibility with modern systems, and ease of use. Users frequently ask about replacing older units due to issues like time loss or voltage mismatches. Many inquire about upgrading to newer models or adjusting existing setups to maintain functionality. Others seek advice on programming custom schedules or troubleshooting minor malfunctions. Additionally, there is interest in understanding the differences between various Slim Dial models and their specifications. These questions highlight the importance of consulting the owner’s manual for clarity on operation, maintenance, and compatibility. The manual serves as a vital resource for addressing these inquiries and ensuring optimal performance.

Technical Queries and Solutions

Technical questions about the Irritrol Slim Dial often focus on addressing issues like time loss, voltage mismatches, and wiring complexities. Users may experience problems with older units, such as the timer losing minutes weekly, which can disrupt watering schedules. Solutions often involve upgrading to newer models or replacing solenoids to ensure compatibility. Wiring adjustments, like cutting zip ties or removing specific wires, can resolve connectivity issues. Additionally, understanding trigger voltages is crucial when integrating the Slim Dial with modern systems. For advanced setups, consulting the manual or seeking professional advice is recommended to avoid further complications. These technical queries highlight the importance of proper installation and configuration for seamless operation.

Troubleshooting FAQs

Frequently asked questions about troubleshooting the Irritrol Slim Dial often revolve around common issues like time loss, wiring problems, and error codes. Users may inquire about why their timer loses minutes weekly, which can be due to outdated hardware or voltage mismatches. Solutions include upgrading to newer models or replacing solenoids. Wiring issues, such as faulty connections or incorrect zone setups, can cause zones to malfunction. Error codes, though not always displayed, can indicate specific problems like low power or sensor malfunctions. For such cases, resetting the timer or checking the power source is advised. Additionally, users often ask about manual mode operations and how to resolve issues when zones fail to activate. Consulting the manual or seeking professional help is recommended for persistent problems.

Conclusion

The Irritrol Slim Dial owner’s manual is your key to unlocking optimal performance and addressing common issues like time loss. It ensures reliable operation and user satisfaction.

Final Thoughts on the Irritrol Slim Dial

The Irritrol Slim Dial remains a reliable choice for lawn irrigation, though its aging design may require careful consideration when upgrading. Users report issues like time loss, often resolved by replacing older units or adjusting solenoid compatibility. The manual is crucial for troubleshooting and maintaining optimal performance. While newer systems offer advanced features, the Slim Dial’s simplicity appeals to those preferring traditional operation. For long-term reliability, regular maintenance and seasonal adjustments are essential. Whether upgrading or retaining your current model, the owner’s manual provides invaluable guidance for ensuring efficient watering and system longevity.

Resources for Further Assistance

For additional support with your Irritrol Slim Dial, consult the official Irritrol website for downloadable manuals and guides. Online forums and DIY repair communities, like those discussing manual mode operations, offer practical advice. The Italian manual provides multilingual support, while videos on platforms like YouTube demonstrate troubleshooting and programming. Local irrigation suppliers, such as the Midland Store, often assist with parts and compatibility questions. For advanced issues, contact Irritrol customer support or authorized distributors. These resources ensure you can resolve issues and optimize your timer’s performance effectively.

fleck 5600 water softener manual

The Fleck 5600 water softener manual serves as a comprehensive guide for installing, programming, and maintaining your system. It outlines key features, step-by-step instructions, and essential troubleshooting tips to ensure optimal performance and longevity of your water softener.

1.1 Key Features of the Fleck 5600 Water Softener

  • The Fleck 5600 water softener features a digital control valve for precise programming and operation.
  • It supports a high flow rate of up to 20 GPM, making it suitable for large households.
  • The system includes a resin tank and brine tank assembly for efficient softening and regeneration.
  • The control valve offers customizable settings for hardness levels and salt dosage.
  • It includes a user-friendly interface for easy navigation and programming.
  • The softener is compatible with various tank sizes to accommodate different water needs.
  • The manual emphasizes optimal performance through proper installation and maintenance.

These features ensure reliable and efficient water softening, catering to a wide range of residential requirements.

1.2 Importance of the Manual for Installation and Operation

The Fleck 5600 water softener manual is essential for successful installation and operation. It provides detailed, step-by-step instructions for system setup, including plumbing connections and control valve programming. By following the manual, users can ensure proper placement, configuration, and initialization of the softener. The guide also covers maintenance tasks, such as checking water hardness levels and replenishing salt, to maintain optimal performance. Additionally, the manual offers troubleshooting tips and error code explanations, helping users address common issues without professional assistance. Adhering to the manual’s guidelines ensures compliance with safety standards and manufacturer recommendations, maximizing the system’s efficiency and longevity. Proper use of the manual helps users achieve consistent water quality and extend the life of their Fleck 5600 water softener.

1.3 Overview of the Fleck 5600 SXT Water Softener

The Fleck 5600 SXT water softener is a high-efficiency system designed to remove hardness minerals from water, improving its quality for household use. It features a advanced control valve that regulates water flow and treatment processes. The system includes a resin tank that filters minerals and a brine tank for regeneration. The SXT model is known for its reliability and user-friendly interface, making it a popular choice for residential applications. The softener is designed to minimize maintenance while delivering consistent results. Its compact design and efficient operation ensure it meets the needs of various water conditions. With its durable construction and innovative features, the Fleck 5600 SXT is a reliable solution for providing soft water to homes, reducing scale buildup, and protecting plumbing systems.

System Components and Accessories

The Fleck 5600 water softener includes a control valve, resin tank, brine tank, and essential accessories like tubing and connectors. These components work together to ensure efficient water softening and system operation.

2.1 Control Valve and Its Functions

The Fleck 5600 control valve is a critical component that directs water flow and manages the softening process. It regulates the intake of hard water, distributes it through the resin tank for softening, and controls the backwash and brine rinse cycles. The valve ensures efficient operation by monitoring water usage and initiating regeneration when necessary. It also manages the flow of brine solution from the brine tank to the resin tank to recharge the resin beads. The control valve is designed to optimize water softening performance, minimize salt usage, and maintain system efficiency. Its advanced features allow for precise control over the softening process, ensuring consistent water quality. Proper functioning of the control valve is essential for the overall performance and longevity of the Fleck 5600 water softener system. Regular maintenance and inspection of the valve are recommended to ensure optimal operation.

2.2 Resin Tank and Brine Tank Assembly

The resin tank is the core of the Fleck 5600 water softener system, containing ion-exchange resin beads that remove hardness minerals from water. The brine tank holds the salt solution used to recharge the resin during regeneration. Both tanks are essential for the softening process; The resin tank is typically connected to the control valve, while the brine tank is linked to the resin tank via a brine line. Proper assembly ensures efficient water softening and prevents system malfunctions. The resin tank should be filled with the recommended amount of resin, and the brine tank should be filled with water softener salt. Correct installation and alignment of these tanks are critical for optimal performance. Regular maintenance, such as checking salt levels and ensuring the brine tank is clean, is necessary to maintain system efficiency and water quality.

2.3 Included Accessories and Parts

The Fleck 5600 water softener system comes with essential accessories and parts to ensure proper installation and operation. These include the control valve, resin tank, and brine tank, which are the primary components of the system. Additional accessories such as a hardness test kit, drain line, and bypass valve are also provided to facilitate installation and maintenance. The control valve is pre-programmed with default settings but can be adjusted based on water hardness levels and usage requirements. The resin tank is filled with high-quality ion-exchange resin beads designed to effectively remove calcium and magnesium ions from water. The brine tank includes a salt grid and safety float to manage the brine solution used during regeneration. Other included parts may vary depending on the specific package but are designed to ensure a seamless and efficient water softening process. Proper use of these accessories is crucial for maintaining optimal system performance and water quality.

Installation Steps and Requirements

Select a suitable location for the system, ensuring adequate space and access to water supply lines. Connect the inlet and outlet ports carefully, following safety guidelines and manufacturer instructions.

3.1 Pre-Installation Checklist

Before starting the installation, ensure all components are included in the package. Verify the control valve, resin tank, and brine tank are undamaged. Check local plumbing codes and regulations. Measure the space where the system will be installed to ensure proper fit. Turn off the main water supply and drain the lines before connecting the softener. Gather necessary tools like a wrench, drill, and tubing cutter. Ensure the area is clean and free from debris. Test the water hardness to confirm the system’s settings. Review the manual for specific requirements. Check for a nearby power source for the control valve. Ensure the drain line is accessible and meets the system’s specifications. Verify the brine tank is positioned correctly, and all connections are compatible with your plumbing setup. Address any leaks or issues before proceeding with the installation.

3.2 Step-by-Step Installation Guide

Begin by mounting the control valve to the resin tank using the provided hardware. Ensure it is securely fastened. Next, connect the brine tank to the resin tank, following the manufacturer’s instructions. Install the bypass valve, making sure it is in the correct position to direct water flow. Connect the drain line to the control valve and secure it to a nearby drain. Attach the inlet and outlet water lines to the appropriate ports, ensuring they are tightly connected. Plug in the control valve and program it according to your water usage and hardness levels. Finally, test the system by running a few cycles to ensure proper function. Check all connections for leaks and verify that the system operates quietly and efficiently. This step-by-step process ensures a smooth and effective installation of your Fleck 5600 water softener.

3.3 Plumbing Connections and Recommendations

When connecting the Fleck 5600 water softener to your plumbing system, ensure the inlet and outlet ports are connected to the correct water supply lines. Use high-quality tubing or pipes, such as PEX or copper, to prevent contamination and leaks. The bypass valve should be installed to allow for easy maintenance and servicing without disrupting water flow. Connect the drain line to a floor drain or utility sink, ensuring it is at least 1/2″ in diameter for proper drainage. Avoid using PVC for the drain line, as it may not withstand the backwash flow. Check local plumbing codes for specific requirements. For optimal performance, maintain a minimum water pressure of 30 PSI and a maximum of 80 PSI. If your household water pressure exceeds this range, consider installing a pressure-reducing valve. Additionally, install a pre-filter upstream of the softener to protect it from debris. Always follow local regulations and consider professional assistance if you are unfamiliar with plumbing procedures.

Programming the Fleck 5600 Control Valve

Program the Fleck 5600 control valve to regulate water treatment processes, including time, hardness levels, and regeneration cycles, ensuring efficient operation and optimal water quality.

4.1 Setting the Time and Basic Parameters

Setting the time and basic parameters on the Fleck 5600 control valve is essential for proper system operation. Begin by accessing the programming mode, typically by pressing and holding the “Set” button until the display shows the current time. Use the up and down arrows to adjust the time to match the current time. Once set, press and hold the “Set” button again to save and exit. For basic parameters, enter the water hardness level, measured in grains per gallon (gpg), using the control valve’s interface. Adjust the salt dosage according to manufacturer guidelines to ensure optimal water softening. Set the regeneration frequency based on water usage patterns, especially if you have a large household. Ensure all settings align with the manual’s instructions to prevent errors and maintain efficient operation. Double-check the manual or consult online resources for clarity, and test the system post-setup to confirm proper function.

4.2 Adjusting Hardness Levels and Salt Dosage

Adjusting the hardness levels and salt dosage on your Fleck 5600 ensures optimal water softening. Access these settings via the control valve interface by pressing the appropriate buttons to navigate to the hardness setting. Enter the hardness level in grains per gallon (gpg) based on your water test results. The salt dosage is typically adjusted in pounds per regeneration cycle. Higher hardness levels may require increasing the salt dosage. For example, if your water is 10 gpg, you might set the salt dosage to 4 pounds. Regularly test your water hardness to ensure accuracy. Adjustments should consider household size and water usage patterns. Monitoring salt levels helps prevent overuse or shortages. After making changes, ensure to save them to maintain the new settings. Refer to the manual for specific guidelines or contact customer support for assistance. Proper calibration ensures efficient operation and softened water quality, which helps extend the system’s lifespan.

4.3 Understanding Operating Modes and Cycles

The Fleck 5600 operates in various modes to efficiently soften water. The system features Normal Mode, where it softens water based on usage, and Vacation Mode, which reduces water usage when the system is inactive. The Diagnostic Mode helps troubleshoot issues and ensures proper function. The system cycles include a backwash phase to clean the resin, brine rinse to replenish salt, and fast rinse to prepare for the next cycle. The control valve monitors water usage and triggers regeneration automatically. Manual cycles can be initiated if needed. Understanding these modes and cycles ensures optimal performance and extends the system’s lifespan. Regular monitoring of the cycles helps maintain water quality and system efficiency. Proper operation of these cycles is crucial for effective water softening and long-term reliability of the Fleck 5600.

Maintenance and Upkeep

Regular maintenance ensures the Fleck 5600 operates efficiently and lasts longer. Key tasks include cleaning the control valve, checking salt levels, and monitoring the resin tank. Always refer to the manual for specific guidance.

5.1 Routine Maintenance Tasks

Regular maintenance is essential to ensure the Fleck 5600 water softener operates efficiently. Start by checking salt levels in the brine tank monthly and refilling as needed to avoid running out. Clean the brine tank every 6 months to remove debris and ensure proper salt dissolving. Inspect the resin bed annually; replacement is typically needed every 8-10 years. Monitor water hardness levels periodically to confirm the system is functioning correctly. Additionally, check for leaks in pipes and connections to prevent water damage. Finally, clean the control valve screen every 3-6 months to maintain water flow and system performance. Refer to the manual for detailed instructions on each task to ensure longevity and optimal operation of your Fleck 5600 water softener.

5.2 Cleaning and Replacing the Control Valve

Cleaning and replacing the control valve on your Fleck 5600 water softener is crucial for maintaining optimal performance. Start by turning off the water supply and unplugging the system to ensure safety. Remove the control valve from the resin tank and disassemble it to access internal components. Use a soft brush or cloth to clean out dirt, mineral buildup, or debris. For stubborn deposits, soak parts in a vinegar solution for 30 minutes before rinsing thoroughly. Reassemble the valve and reinstall it, ensuring all connections are secure. If the valve is damaged or worn, replace it with a compatible Fleck 5600 replacement part. Refer to the manual for specific part numbers and installation instructions. Regular cleaning prevents clogs and ensures accurate water flow regulation, while replacement restores system efficiency when repairs are no longer feasible.

5.3 When to Replace Resin and Other Parts

Replacing the resin and other components of your Fleck 5600 water softener is essential to maintain its efficiency. The resin typically lasts 10 to 15 years, depending on water usage and quality. Look for signs such as reduced water softness, increased hardness, or discolored water, which indicate the resin may need replacement. Other parts, like the brine tank float or drain line, should be inspected regularly and replaced if damaged or malfunctioning. Always use genuine Fleck replacement parts to ensure compatibility and performance. If you notice a significant decline in system performance or error codes related to flow issues, it may be time to replace worn-out components. Refer to the manual for guidance on identifying and replacing parts to keep your water softener functioning at its best.

Troubleshooting Common Issues

Troubleshooting common issues with the Fleck 5600 involves addressing error codes, low water pressure, and salt bridge problems. Regular maintenance helps prevent these issues. Consult the manual for solutions.

6.1 Identifying and Resolving Error Codes

The Fleck 5600 water softener may display error codes like “01,” “02,” or “03,” indicating issues such as faulty sensors, low salt levels, or system malfunctions. These codes are essential for quick diagnosis. Refer to the manual to understand each code’s meaning. For example, error “01” often relates to the water flow sensor, while “02” may signal a stuck valve or faulty switch. To resolve these, check the sensor connections, ensure proper water flow, and clean or replace faulty components. Resetting the system by unplugging and replugging it can sometimes clear minor glitches. Always consult the troubleshooting section in the manual for specific solutions tailored to each error code. Regular maintenance, such as cleaning sensors and ensuring proper salt levels, can prevent many of these issues from occurring. Addressing errors promptly ensures optimal performance and longevity of the system.

6.2 Solving Water Flow and Pressure Problems

Water flow and pressure issues with the Fleck 5600 can arise due to improper installation, clogged filters, or valve malfunctions. Low water pressure may result from undersized pipes or restricted flow in the system. To address this, ensure all pipes are correctly sized and check for clogs in the filter or venturi valve. High water pressure can damage the system, so installing a pressure-reducing valve is recommended. If water flow is uneven, inspect the control valve for blockages and clean or replace it if necessary. Leaks in connections can also disrupt flow; tighten fittings and apply sealants as needed. Regular maintenance, such as cleaning the venturi valve and ensuring proper salt levels, helps prevent pressure imbalances. If issues persist, consult the manual or contact a professional to ensure the system operates efficiently and safely.

The Fleck 5600 water softener manual provides comprehensive guidance for optimal performance, ensuring clean water and system longevity. Follow instructions carefully for best results.

7.1 Summary of Key Takeaways

The Fleck 5600 water softener manual is an essential guide for installing, operating, and maintaining the system. It highlights the importance of proper installation steps, regular maintenance, and understanding the control valve functions. The manual emphasizes the need to program the system accurately, monitor water hardness levels, and address common issues promptly. By following the troubleshooting section, users can resolve errors and ensure optimal performance. Routine tasks, such as cleaning the control valve and replacing resin, are crucial for longevity. The manual also provides insights into system components, ensuring users understand how each part contributes to water softening. Overall, adhering to the manual’s instructions ensures efficient operation, superior water quality, and extended system lifespan. This guide is a valuable resource for both new and experienced users of the Fleck 5600 water softener.

7.2 Final Tips for Optimal Performance

To ensure the Fleck 5600 water softener operates at its best, regular maintenance is key. Always check salt levels monthly and refill as needed to prevent resin damage. Monitor water hardness levels periodically to confirm the system is functioning correctly. Inspect plumbing connections for leaks and tighten any loose fittings. Clean the control valve every 6 months to remove mineral buildup. Replace the resin bed every 8-10 years, depending on water usage and quality. Reset the system after power outages to maintain programming accuracy. Avoid using the softener during backwashing to prevent damage. Keep the brine tank clean and ensure proper salt dissolve to maintain efficiency. By following these tips, you can extend the lifespan of your Fleck 5600 and enjoy consistently soft water. Proper care ensures optimal performance and protects your investment.

lexus rx 350 owners manual pdf

The Lexus RX 350 Owner’s Manual PDF is an essential guide for owners, offering detailed insights into safety features, maintenance, and advanced technology for optimal vehicle operation.

1.1 Importance of the Owner’s Manual

The Lexus RX 350 Owner’s Manual is a vital resource for all vehicle owners, providing essential information for safe and efficient operation. It offers detailed insights into the car’s features, functions, and maintenance requirements, helping drivers understand their vehicle better. The manual is indispensable for troubleshooting common issues and ensuring proper care. Accessing it in PDF format allows owners to easily search for specific information, making it a convenient tool for both new and experienced drivers. Regularly consulting the manual helps maintain the vehicle’s performance and longevity, ensuring a seamless driving experience.

1.2 What to Expect in the Manual

The Lexus RX 350 Owner’s Manual PDF is a comprehensive guide designed to help owners understand and maintain their vehicle effectively. It covers essential topics such as safety features, driving guidelines, and interior technology. The manual also includes detailed maintenance schedules and troubleshooting tips to ensure optimal performance. Additionally, it provides model-specific information, making it a tailored resource for different years of the RX 350. The document is organized clearly, allowing users to navigate easily and find relevant information quickly. By following the manual’s instructions, owners can maximize their driving experience and extend the lifespan of their vehicle.

Safety Information and Precautions

The Lexus RX 350 Owner’s Manual emphasizes critical safety protocols to ensure driver and passenger well-being, providing guidelines to prevent accidents and maintain proper vehicle handling.

2.1 Key Safety Features of the Lexus RX 350

The Lexus RX 350 is equipped with advanced safety features designed to protect occupants and prevent accidents. These include a comprehensive airbag system, Vehicle Stability Control (VSC), and Anti-lock Braking System (ABS). The Pre-Collision System with pedestrian detection and Dynamic Radar Cruise Control enhance driver confidence. Additional features like Blind Spot Monitoring and Rear Cross Traffic Alert improve visibility and awareness. The robust body structure absorbs and distributes impact forces, ensuring passenger safety. Proper use of seatbelts, child restraints, and awareness of safety systems are essential for maximizing protection. Regular maintenance of these features, as outlined in the manual, ensures optimal performance in emergencies.

2.2 Warning Symbols and Their Meanings

The Lexus RX 350 owner’s manual includes a detailed guide to warning symbols that may appear on the instrument cluster. These symbols are designed to alert the driver of potential issues or system activations. Common symbols include the exclamation point in a circle (tire pressure monitoring), a seatbelt icon (unfastened seatbelts), and a car with a wrench (maintenance required). Red symbols indicate urgent issues, while yellow symbols signal less critical alerts. Understanding these symbols is crucial for safe driving and proper vehicle maintenance. The manual provides a comprehensive list with explanations to help drivers respond appropriately when a symbol illuminates.

Driving the Lexus RX 350

Experience smooth acceleration and responsive handling with the Lexus RX 350. Familiarize yourself with driving modes like Sport or Eco for customized performance. Prioritize fuel efficiency and safety by following guidelines in the manual for optimal driving practices.

3.1 Getting Familiar with the Controls

Begin by locating key controls such as the steering wheel buttons, gearshift, and infotainment system. Understand the layout of the dashboard, including climate controls and instrument cluster. Familiarize yourself with the position and function of essential features like the parking brake, hazard lights, and adaptive cruise control. The manual provides detailed descriptions of each control, ensuring a smooth and intuitive driving experience. Pay attention to customizable settings, such as steering wheel adjustments and driver-assist features, to tailor your driving environment. Proper knowledge of these components enhances safety, comfort, and overall vehicle performance.

3.2 Driving Tips for Optimal Performance

For a smooth and efficient driving experience, start with gradual acceleration to avoid jerky movements. Use gentle braking to maintain control, especially on uneven surfaces. When cornering, reduce speed and steer smoothly to ensure stability. Engage Sport mode for enhanced responsiveness on winding roads. Always maintain a safe distance from other vehicles to allow ample reaction time. Utilize adaptive cruise control for highway driving to reduce fatigue. Monitor systems like traction control and tire pressure to optimize performance. Keep the vehicle evenly loaded to ensure balanced weight distribution. Avoid aggressive driving to maximize fuel efficiency and minimize wear on components.

Interior Features and Technology

The Lexus RX 350 boasts a luxurious interior with advanced tech, including a touchscreen display, voice command, and seamless smartphone integration for enhanced comfort and connectivity.

4.1 Lexus Display Audio System Overview

The Lexus Display Audio System offers an intuitive 8-inch touchscreen interface, providing seamless control over entertainment, navigation, and vehicle settings. It supports voice command functionality, enabling hands-free operation for enhanced safety and convenience. The system is compatible with Apple CarPlay® and Android Auto™, allowing smartphone integration for apps like maps, music, and messaging. Additional features include USB ports, Bluetooth® connectivity, and a premium sound system for an immersive audio experience. The manual details how to customize settings, pair devices, and troubleshoot common issues, ensuring a smooth user experience.

4.2 Navigation and Infotainment Setup

The Lexus RX 350’s navigation system provides turn-by-turn directions with real-time traffic updates, ensuring efficient route planning. The infotainment setup integrates seamlessly with the Display Audio System, offering a user-friendly interface for managing music, podcasts, and phone calls. Pairing devices via Bluetooth® or USB is straightforward, and the system supports voice commands for hands-free navigation input. Customization options allow drivers to tailor the home screen and prioritize frequently used features. The manual includes step-by-step guides for activating navigation services, updating maps, and troubleshooting connectivity issues, ensuring a hassle-free experience for drivers.

Maintenance and Care

Regular maintenance ensures optimal performance and longevity. Check fluid levels, tire pressure, and follow recommended schedules for a well-maintained vehicle.

5.1 Scheduled Maintenance Requirements

Regular maintenance is crucial for the Lexus RX 350’s performance and longevity. The owner’s manual outlines specific intervals for oil changes, tire rotations, and fluid checks. Typically, oil changes are recommended every 5,000 to 7,500 miles, while tire rotations should occur every 5,000 miles. Brake pads and rotors should be inspected every 12,000 miles, and the battery should be checked every 6 months. Spark plugs are usually replaced at 30,000-mile intervals, and the timing belt is due for replacement at 90,000 miles. Adhering to these schedules ensures optimal functionality and prevents potential issues. Refer to the manual for detailed guidelines tailored to your driving conditions.

5.2 DIY Maintenance Tips

Performing routine DIY maintenance can save time and money while keeping your Lexus RX 350 in excellent condition. Regularly check and top off essential fluids like engine oil, coolant, and windshield washer fluid. Inspect and replace the air filter every 15,000 miles to improve fuel efficiency and performance. Tire pressure should be checked monthly and aligned with the recommended levels in the manual. Additionally, clean the battery terminals to prevent corrosion and ensure reliable starts. For minor issues like replacing wiper blades or cabin air filters, consult the manual for step-by-step guidance. These simple tasks can enhance your vehicle’s longevity and overall functionality.

Troubleshooting Common Issues

Troubleshooting common issues in your Lexus RX 350 involves identifying symptoms and applying solutions. Check error lights, consult the manual, and address problems promptly. For persistent issues, contact a certified technician to ensure proper repairs and maintain your vehicle’s reliability and performance.

6.1 Identifying and Solving Basic Problems

Identifying and solving basic issues in your Lexus RX 350 starts with recognizing common symptoms like dashboard warning lights or unusual noises. Always refer to the owner’s manual for guidance. For example, if the “Check Engine” light illuminates, check for loose gas caps or scan for error codes using an OBD-II scanner. Strange noises may indicate low fluid levels or worn belts. Review recent maintenance to ensure all scheduled services are up to date. Simple fixes, like resetting systems or replacing minor components, can often resolve issues. However, if problems persist, consult a professional to avoid further complications.

6.2 When to Contact a Professional

There are situations when DIY troubleshooting isn’t enough, and professional assistance is necessary. If issues persist after basic checks, such as persistent warning lights or performance problems, consult a certified Lexus technician. Complex systems like the hybrid powertrain, advanced safety features, or navigation require specialized tools and expertise. Additionally, if you’re unsure about diagnosing or repairing a problem, seeking professional help ensures safety and prevents further damage. Emergencies like sudden system failures or unusual behaviors should also be addressed by experts. Always refer to the manual for guidance on when professional intervention is recommended to maintain your vehicle’s optimal condition and warranty validity.

Model-Specific Guides

This section provides detailed guides for specific Lexus RX 350 models, including the 2015, 2021, 2022, 2024, and 2025 editions. Each guide addresses model-specific features, updates, and unique operating instructions tailored to the respective year.

7.1 2015 Lexus RX 350 Owner’s Manual

The 2015 Lexus RX 350 Owner’s Manual is a comprehensive guide designed to help drivers understand and maintain their vehicle effectively. It covers key features, operating instructions, and maintenance schedules specific to the 2015 model year. The manual includes detailed information about the vehicle’s safety systems, infotainment setup, and driver-assistance technologies. Additionally, it provides troubleshooting tips and DIY maintenance advice. The 2015 edition focuses on the V6 engine, fuel efficiency, and comfort-enhancing features introduced that year. Owners can find instructions for customizing settings, pairing devices, and utilizing the navigation system. Referencing this manual ensures optimal performance and longevity of the 2015 Lexus RX 350.

7.2 2021 Lexus RX 350 Owner’s Manual

The 2021 Lexus RX 350 Owner’s Manual provides detailed insights into the advanced features and technologies of the 2021 model. It highlights the improved safety systems, including adaptive cruise control and lane-keeping assist. The manual also covers the updated infotainment system, touchscreen navigation, and smartphone integration capabilities. Drivers can learn about the vehicle’s fuel efficiency enhancements and the optional hybrid powertrain. Additionally, it offers guidance on customizing settings, such as driver profiles and seat memory functions. The 2021 manual emphasizes the latest connectivity features, like wireless charging and voice command systems. It serves as an essential resource for optimizing the driving experience of the 2021 Lexus RX 350.

7.3 2022 Lexus RX 350 Owner’s Manual

The 2022 Lexus RX 350 Owner’s Manual is tailored to the model’s enhanced features and technological advancements. It provides guidance on the updated Lexus Safety System+ 2.0, including improved adaptive cruise control and lane-tracing assist. The manual also details the new 14-inch touchscreen infotainment system and its intuitive interface. Additionally, it covers the optional 360-degree camera system and the expanded suite of convenience features. Drivers can learn about the refined engine performance and suspension tweaks for a smoother ride. The manual also emphasizes eco-driving modes and fuel-saving technologies. It is a comprehensive guide for owners to maximize the capabilities of their 2022 Lexus RX 350.

7.4 2024 Lexus RX 350 Owner’s Manual

The 2024 Lexus RX 350 Owner’s Manual highlights the model’s cutting-edge features and advancements. It covers the all-new Lexus Interface multimedia system, featuring a 14-inch touchscreen and enhanced voice command functionality. The manual also details the updated Lexus Safety System+ 3.0, which includes improved adaptive cruise control and lane-keeping assist. Additionally, it provides insights into the new turbocharged engine’s performance and efficiency, as well as the refined suspension system for a smoother ride. The manual also emphasizes the expanded list of standard and optional features, including a panoramic moonroof and 360-degree camera system. It serves as an essential guide for owners to fully utilize their vehicle’s capabilities.

7.5 2025 Lexus RX 350 Owner’s Manual

The 2025 Lexus RX 350 Owner’s Manual introduces the latest advancements in luxury and technology. It details the updated Lexus Interface system, now with enhanced personalization options and seamless smartphone integration. The manual also covers the new semi-aniline leather-trimmed interior and customizable ambient lighting. Additionally, it provides information on the refined hybrid powertrain, offering improved fuel efficiency and smoother acceleration. The manual also explains the advanced driver-assistance systems, including a 360-degree camera and improved adaptive cruise control. It serves as a comprehensive guide for owners to explore and optimize the vehicle’s features, ensuring a premium driving experience tailored to modern needs and preferences.

Additional Resources

Explore complementary guides, including the Multimedia System Guide and Navigation System Instructions, for enhanced functionality. These resources provide detailed steps and troubleshooting tips for optimal system usage.

8.1 Multimedia System Guide

The Multimedia System Guide provides detailed instructions for operating the Lexus RX 350’s infotainment system. It covers setup for Bluetooth connectivity, voice command functions, and navigation. Learn how to customize settings, such as display preferences and audio equalization, for a personalized experience. The guide also explains how to pair compatible devices and access apps like Siri EyesFree or Pandora. Troubleshooting tips are included to resolve common issues like connectivity problems or software updates. This resource is essential for maximizing the multimedia system’s capabilities, ensuring seamless integration with your smartphone and enhancing your driving experience. Refer to it for optimal use of your vehicle’s technology features.

8.2 Navigation System Instructions

The Navigation System Instructions section of the Lexus RX 350 Owner’s Manual PDF details how to operate and customize the vehicle’s navigation features. Learn how to input destinations, use voice commands, and understand map displays. The guide explains how to activate real-time traffic updates and set route preferences, such as avoiding toll roads. It also covers how to update the navigation system’s software and maps for the latest data. Tips for optimizing route calculations and managing waypoints are included. This section ensures drivers can confidently navigate using the system’s advanced features, enhancing their overall driving experience with precise and up-to-date directions.

Warranty and Service Information

Understand your Lexus RX 350’s warranty coverage, including duration and mileage limits. Learn how to schedule service appointments and maintain records for warranty validation.

9.1 Understanding Your Vehicle’s Warranty

Your Lexus RX 350 comes with a comprehensive warranty program designed to protect your investment. The basic warranty typically covers parts and labor for defects in materials or workmanship for 4 years or 50,000 miles, while the powertrain warranty extends to 6 years or 70,000 miles. This coverage includes engine, transmission, and drivetrain components. Additionally, corrosion perforation is covered for up to 5 years, regardless of mileage. It’s essential to review your owner’s manual to understand specific terms, conditions, and exclusions. Proper maintenance and adherence to scheduled services are crucial for warranty validity. Always keep detailed service records for verification purposes.

9.2 Scheduling Service Appointments

Scheduling regular maintenance for your Lexus RX 350 is crucial to ensure optimal performance and warranty validity. Use the Lexus owners portal or mobile app to book appointments conveniently. You can also contact your local Lexus dealership directly via phone or email. Provide your vehicle’s VIN and preferred dates to confirm the service. Routine maintenance includes oil changes, tire rotations, and system checks. Always refer to your owner’s manual for recommended intervals. Proper documentation of services ensures compliance with warranty terms. Lexus dealerships offer skilled technicians and genuine parts, guaranteeing quality service. Keep track of your appointments to maintain your vehicle’s health and longevity.

freestyle lite glucose meter manual

Freestyle Lite Glucose Meter Manual: A Comprehensive Guide

Welcome to the comprehensive guide for the FreeStyle Lite glucose meter! This manual will walk you through everything you need to know‚ from initial setup to understanding your test results. Learn to manage diabetes effectively with this small‚ portable system.

The FreeStyle Lite meter is a compact and user-friendly device designed for individuals managing diabetes. It facilitates convenient blood glucose monitoring at home or on the go. This meter is part of the FreeStyle Lite system‚ which includes test strips and control solutions specifically designed for accurate results. The FreeStyle Lite meter requires no coding‚ simplifying the testing process and reducing potential errors. Its small size and portability make it easy to carry in a pocket or purse‚ ensuring that users can monitor their blood sugar levels whenever and wherever needed.

The FreeStyle Lite system is intended for measuring blood glucose from samples taken from various sites‚ including the forearm‚ upper arm‚ hand‚ thigh‚ calf‚ or fingers. It utilizes a small blood sample size of only 0.3 microliters. The meter provides fast results in approximately 5 seconds‚ allowing for quick and efficient monitoring. It’s crucial to only use FreeStyle Lite test strips and control solution with this meter to ensure accurate readings. Other test strips or control solutions may produce inaccurate results‚ leading to improper management of blood glucose levels.

Key Features and Benefits

The FreeStyle Lite meter boasts several key features that make it a preferred choice for blood glucose monitoring. A standout benefit is its no coding requirement‚ eliminating a step and minimizing potential errors. This makes the testing process more straightforward‚ especially for those new to blood glucose monitoring. The meter requires only a tiny 0.3 microliter blood sample‚ reducing discomfort during testing. Results are displayed rapidly‚ typically within 5 seconds‚ allowing for quick and convenient monitoring. The backlit display and test strip port light enable testing in low-light conditions‚ adding to its versatility.

The FreeStyle Lite meter offers alternative site testing‚ allowing users to test on their forearm‚ upper arm‚ hand‚ thigh‚ or calf‚ providing greater flexibility and potentially less pain compared to traditional fingertip testing. The meter also features memory storage‚ enabling users to track their blood glucose levels over time. This data can be downloaded using a compatible data management system. The meter alerts the user with beeps‚ and these sound volumes can be adjusted. Furthermore‚ the meter includes reminder alarms to prompt testing throughout the day‚ promoting consistent monitoring habits.

Using the Freestyle Lite Meter: Step-by-Step Instructions

To begin using your FreeStyle Lite meter‚ first ensure you have all necessary supplies: the meter‚ FreeStyle Lite test strips‚ a lancing device‚ and lancets. Wash your hands thoroughly with soap and water‚ then dry them completely. Insert a new FreeStyle Lite test strip into the test strip port; the meter will automatically power on. The system check screen will appear; verify that it matches the example in your manual.

Next‚ use the lancing device to obtain a small drop of blood from your chosen testing site. Gently apply the blood sample to the sample area on the test strip; ensure the sample area is filled completely. The meter will beep‚ indicating that the test has begun. After five seconds‚ your blood glucose result will appear on the display screen. Record the result in a logbook or using a compatible data management system. Safely dispose of the used test strip and lancet. Remember to consult your healthcare professional for guidance on interpreting your results and adjusting your diabetes management plan.

Testing Your Blood Glucose

Testing your blood glucose with the FreeStyle Lite meter is a crucial step in managing your diabetes. The FreeStyle Lite system allows you to test blood glucose from your forearm‚ upper arm‚ hand‚ thigh‚ calf‚ or fingers. Before you begin‚ it is important to wash your hands thoroughly with soap and water‚ then dry them completely. Gather your supplies: the FreeStyle Lite meter‚ FreeStyle Lite test strips‚ a lancing device‚ and lancets.

Ensure that the test strips are within their expiration date and stored properly. Insert a new FreeStyle Lite test strip into the meter’s test strip port‚ printed side up. The meter will automatically turn on and display the system check screen. Use the lancing device to obtain a small blood sample‚ only about 0.3 microliters is required. Gently touch the sample area of the test strip to the blood drop. The meter will beep and begin the test. After 5 seconds‚ your blood glucose level will be displayed. Record the result and consult with your healthcare provider.

Understanding the System Check Screen

The System Check Screen on your FreeStyle Lite meter is a crucial diagnostic tool that appears every time the meter is turned on. This screen verifies that the meter is functioning correctly and displaying information accurately. It’s imperative that you understand what the System Check Screen should look like and how to interpret it to ensure reliable blood glucose readings. Before each use‚ carefully compare the display on your meter to the example provided in the user manual.

Ensure that all segments and icons on the screen are illuminated and match the example exactly. If any part of the display is missing‚ faint‚ or doesn’t correspond with the expected pattern‚ do not use the meter. Using the meter with a faulty display can lead to incorrect results‚ which can be dangerous. Contact Customer Care immediately if the System Check Screen does not match the correct example. This initial check is essential for accurate blood glucose monitoring and effective diabetes management.

Performing a Blood Glucose Test

Performing a blood glucose test with your FreeStyle Lite meter is a straightforward process‚ but accuracy depends on following the steps carefully. Begin by washing your hands thoroughly with soap and warm water‚ then dry them completely; Insert a new FreeStyle Lite test strip into the test strip port of the meter‚ ensuring the top end goes in first. The meter should power on automatically.

Next‚ use a lancing device to obtain a small drop of blood‚ about the size of a pinhead (0.3 microliters). Gently touch the sample area of the test strip to the blood drop‚ allowing it to be drawn in automatically. The meter will beep when enough blood has been applied. The meter will then begin a countdown‚ and your blood glucose result will appear on the display screen within a few seconds. Record your result and dispose of the used test strip and lancet properly‚ following safety guidelines.

Alternative Site Testing

The FreeStyle Lite meter allows for alternative site testing (AST)‚ enabling you to test your blood glucose levels on areas other than your fingertips. Approved testing locations include the forearm‚ upper arm‚ hand‚ thigh‚ and calf. AST can be less painful for some users as these areas have fewer nerve endings. However‚ it’s crucial to understand when AST is appropriate.

AST is not recommended when blood glucose levels are changing rapidly‚ such as after a meal or during exercise. In these situations‚ fingertip testing provides a more accurate reflection of current glucose levels. Use fingertip testing if you suspect hypoglycemia (low blood sugar) or if you’re feeling unwell. Before using AST‚ consult your healthcare professional to determine if it is suitable for your individual needs. Remember to follow the same testing procedure as with fingertip testing‚ ensuring the test site is clean and dry before obtaining a blood sample.

Control Solution Testing

Control solution testing is a vital step to ensure your FreeStyle Lite meter and test strips are functioning correctly. This test uses a special solution containing a known amount of glucose‚ allowing you to verify the accuracy of your system. It is recommended to perform a control solution test: when you open a new vial of test strips‚ if you suspect your meter is giving inaccurate readings‚ if you’ve dropped the meter‚ or if the test strips have been exposed to extreme temperatures or humidity.

To perform a control solution test‚ follow the same procedure as a blood glucose test‚ but instead of applying blood‚ apply a drop of FreeStyle control solution to the test strip. The result should fall within the range printed on the test strip vial. If the result is outside this range‚ it indicates a potential problem with the meter or test strips. Do not use the meter for blood glucose testing until you have resolved the issue. Consult the troubleshooting section of this manual or contact customer care for assistance.

Interpreting Test Results

Understanding your blood glucose test results is crucial for effective diabetes management. The FreeStyle Lite meter displays results in mmol/L. A normal blood glucose range typically falls between 3.9 to 7.2 mmol/L before meals and less than 10.0 mmol/L two hours after meals‚ but this can vary depending on individual factors and your healthcare professional’s recommendations.

A result below 3.3 mmol/L indicates hypoglycemia (low blood glucose)‚ which can cause symptoms like weakness‚ sweating‚ shakiness‚ headache‚ and confusion. Follow your healthcare professional’s advice to treat hypoglycemia. A result above 27.8 mmol/L indicates hyperglycemia (high blood glucose)‚ which can cause fatigue‚ thirst‚ excessive urination‚ and blurry vision. Follow your healthcare professional’s advice to treat hyperglycemia. If your blood glucose result does not match how you feel‚ perform a control solution test to confirm that your meter and strips are working properly. Always consult with your healthcare professional for personalized guidance on interpreting your test results and adjusting your treatment plan.

Troubleshooting Common Issues

Encountering issues with your FreeStyle Lite meter? Here’s a guide to troubleshooting common problems. If you receive an error message‚ consult your manual for specific error codes and solutions. If the meter displays “LO‚” your blood glucose may be lower than 1.1 mmol/L. If the meter displays “HI‚” your blood glucose may be higher than 27.8 mmol/L.

If you get an unexpectedly high or low reading‚ repeat the test with a new test strip. Ensure the test strip is not expired and is properly inserted. If the issue persists‚ perform a control solution test to verify the meter and strips are working correctly. If the control solution results are out of range‚ contact customer care. Ensure the sample size is adequate (0.3 microliters). Clean the meter with a damp cloth‚ avoiding moisture in the ports. If problems continue‚ contact customer support for further assistance.

Setting Up and Using Meter Memory

The FreeStyle Lite meter is equipped with a memory function that stores your recent blood glucose test results. This feature allows you to track your glucose levels over time and share the data with your healthcare provider. To access the meter’s memory‚ start with the meter off (no test strip inserted). Press the designated memory button. The meter will display your 7-day average (excluding control solution‚ LO‚ and HI readings).

The meter memory stores the last 400 test results‚ complete with the date and time of each test. Use the scroll buttons to navigate through the stored results‚ with the most recent result appearing first. This historical data can be invaluable in identifying trends and patterns in your blood glucose levels‚ aiding in better diabetes management. You can also download the test results. If you want to exit the meter memory just press and hold the designated button.

Care and Maintenance of the Meter

Proper care and maintenance are crucial for ensuring the accuracy and longevity of your FreeStyle Lite meter. To keep your meter in optimal condition‚ avoid getting dirt‚ dust‚ blood‚ control solution‚ or any liquid inside the test strip and data ports. Clean the exterior of the meter using a soft‚ damp cloth. Never immerse the meter in water or any other liquid‚ as this can cause irreparable damage to the electronic components.

When not in use‚ store the meter in a cool‚ dry place‚ away from extreme temperatures and humidity. The FreeStyle Lite meter is powered by a 2032‚ 3-volt lithium battery‚ which typically provides enough power for approximately 1000 tests. Should the battery need replacing‚ refer to the user manual for proper instructions. Always make sure to dispose of old batteries responsibly‚ following local regulations for separate collection of spent batteries. With proper care‚ your FreeStyle Lite meter will provide you with years of reliable service.

ge profile advantium 120 microwave manual

Overview of GE Profile Advantium 120 Microwave Manuals

GE Profile Advantium 120 microwave manuals provide essential guidance for operating and maintaining these versatile appliances․ These manuals cover a range of topics‚ from basic usage to troubleshooting‚ ensuring users can effectively utilize their Advantium ovens․ They are available in PDF format for easy access․

Availability of Manuals

GE Profile Advantium 120 microwave manuals are readily available through various online resources․ Many appliance-focused websites‚ such as ManualsLib‚ offer these manuals for free download in PDF format․ This allows users to easily access the information they need‚ whether it’s on a computer‚ tablet‚ or smartphone․ Furthermore‚ GE’s official website often hosts manuals for their appliances‚ ensuring a reliable source for these documents․ These manuals can also be found on some online retail platforms that sell GE appliances․ The availability of multiple sources ensures that users have convenient options to find the specific manual for their Advantium 120 model․ Whether you need a quick start guide or a detailed technical service manual‚ these online resources provide a wealth of information for your GE Advantium 120 microwave․ This wide availability means users can quickly find the needed documentation‚ regardless of the model variant or year of manufacture‚ further enhancing the usability and lifespan of the appliance․ The digital formats also allow users to search for specific information within the manuals‚ thus providing an efficient way to resolve issues or find the instructions they need․

Types of Manuals Available

Several types of manuals are available for the GE Profile Advantium 120 microwave‚ catering to different user needs․ The most common is the Owner’s Manual‚ which provides essential operating instructions‚ safety guidelines‚ and cleaning tips․ This manual is crucial for new users and those needing a refresher on basic functions․ A Technical Service Manual is also available‚ targeting technicians and those with advanced knowledge․ It includes detailed schematics‚ troubleshooting procedures‚ and component information for repairs․ Additionally‚ there are Dimensions and Installation Information manuals‚ which are critical during appliance installation‚ providing precise measurements and electrical requirements․ These manuals ensure the safe and correct setup of the Advantium 120․ Finally‚ a Quickstart Cooking Manual offers a simplified guide to quickly begin using the appliance with pre-programmed settings․ This is useful for users wanting to start cooking right away․ Each manual type serves a specific purpose‚ ensuring users can find the exact information they need‚ whether for basic operation or more complex technical tasks‚ thus maximizing the value and lifespan of the GE Profile Advantium 120 microwave․

Specific Model Manuals

GE offers manuals for specific Advantium 120 models‚ including SCA1000‚ SCA1001KSS‚ CSA1201RSS‚ PSA9120SFSS‚ and PSA9120SPSS․ These model-specific manuals ensure users have accurate information tailored to their particular appliance‚ aiding in proper use and maintenance․

GE SCA1000 Manuals

The GE SCA1000 manuals are designed to provide comprehensive information for owners of this specific Advantium 120 model․ These manuals are available for download in PDF format‚ ensuring accessibility for all users․ The primary focus of these documents is to guide users through the various functions and features of the SCA1000‚ which includes its unique speed-cooking capabilities and microwave functionality․ Users can expect detailed instructions on how to operate the appliance safely and effectively‚ including guidance on setting cooking times‚ selecting appropriate power levels‚ and utilizing pre-programmed settings․ The manuals also include important safety precautions to prevent accidents and ensure the long-term performance of the appliance․ Furthermore‚ users will find sections dedicated to maintenance and cleaning‚ which are critical for preserving the appliance’s performance and appearance․ Troubleshooting tips for common issues are also included‚ helping users address problems independently before seeking professional help․ The GE SCA1000 manuals are an indispensable resource for every owner of this model․

GE SCA1001KSS Manuals

The GE SCA1001KSS manuals offer a detailed guide for owners of this Profile Advantium 120 above-the-cooktop oven․ These documents serve as a crucial resource for understanding the appliance’s features and proper operation․ The manuals are available in formats such as PDF‚ making them easily accessible for download and review․ They provide comprehensive instructions on using the combination of radiant heat and microwave technology offered by the SCA1001KSS․ Users will find specific guidance on various cooking modes‚ including speed cook‚ microwave‚ and oven functions․ The manuals also detail the pre-programmed recipes available‚ enabling users to quickly and efficiently prepare a range of dishes․ Furthermore‚ these manuals include sections on installation‚ maintenance‚ and troubleshooting․ Owners can find information regarding proper electrical connections and recommended cleaning practices․ Common issues and their potential solutions are also addressed to help users maintain and repair the unit․ The manuals are designed to help users get the most out of their GE SCA1001KSS oven․ The manual also features dimensional information and installation details․

GE CSA1201RSS Manuals

The GE CSA1201RSS manuals provide comprehensive information for users of the GE Cafe Advantium 120 above-the-cooktop oven․ These manuals are essential for understanding the features and proper operation of this appliance‚ which combines microwave and oven functionalities․ Available in downloadable PDF format‚ the manuals offer detailed instructions on utilizing the oven’s various cooking modes‚ such as speed cook and convection baking․ They include information about pre-programmed recipes and how to use the custom recipe saver‚ allowing for efficient meal preparation․ Furthermore‚ the manuals cover installation guidelines‚ ensuring users can correctly set up the appliance․ Maintenance and troubleshooting sections offer valuable advice on keeping the CSA1201RSS in optimal condition․ Users will find guidance on cleaning procedures and solutions to common issues․ The manuals also address safety precautions to be observed while using the appliance․ Additionally‚ they may include dimensional information and specifics related to electrical requirements for installation․ The GE CSA1201RSS manuals are a reliable resource for maximizing the performance and lifespan of the appliance․ They include information for related models such as PSA1201RSS‚ PSA1200RBB‚ and PSA1200RWW․

GE PSA9120SFSS Manuals

The GE PSA9120SFSS manuals are specifically designed for the GE Profile Advantium 120 over-the-range microwave oven․ These documents provide essential guidance for owners‚ covering everything from initial setup to advanced cooking techniques․ The manuals detail the various functions of the appliance‚ including its speed-cook technology‚ convection baking‚ and microwave modes․ Users will find clear instructions on how to utilize the pre-programmed recipes and the custom recipe saver feature‚ enabling them to prepare meals efficiently․ The manuals also include important safety information‚ ensuring users operate the appliance safely and effectively․ Troubleshooting sections provide advice on resolving common issues‚ such as problems with heating or control panel malfunctions․ Furthermore‚ the manuals offer guidance on cleaning and maintenance‚ helping to prolong the life of the appliance․ They also may contain information on fuse replacement and other common repairs․ The GE PSA9120SFSS manuals are a valuable resource for maximizing the capabilities of this advanced microwave oven․ They can be downloaded in PDF format for convenient access․ These manuals serve as a comprehensive guide for users of this specific model․

GE PSA9120SPSS Manuals

The GE PSA9120SPSS manuals offer detailed instructions and support for the GE Profile Over-the-Range Oven with Advantium Technology․ These manuals are crucial for owners seeking to fully understand and utilize the capabilities of this advanced kitchen appliance․ The documentation covers various aspects‚ including operation‚ maintenance‚ and troubleshooting․ Users can find information on the Advantium technology‚ which combines speed cooking‚ convection baking‚ and microwave functionalities․ The manuals provide step-by-step guidance on using the pre-programmed recipes‚ as well as how to save custom recipes for future use․ They also explain how to set up and operate the different cooking modes‚ ensuring optimal results for various dishes․ Safety instructions are prominently featured to prevent accidents and ensure proper appliance usage․ The manuals may also include information on installation guidelines‚ although this is typically found in separate installation guides․ Troubleshooting sections assist users in diagnosing and resolving common problems․ These manuals serve as a comprehensive resource‚ providing the necessary knowledge for both new and experienced users of the GE PSA9120SPSS model․ The manuals are usually accessible in PDF format for easy viewing and download․

Key Features and Functions

The GE Profile Advantium 120 boasts speed-cook technology‚ combining microwave‚ convection‚ and radiant heat․ It offers versatile cooking options‚ including pre-programmed recipes and custom settings for various culinary needs and preferences․

Advantium Technology

The Advantium technology‚ featured in the GE Profile Advantium 120‚ is a unique and powerful combination of cooking methods designed to deliver speed and versatility․ It merges the speed of microwave cooking with the precision of convection and radiant heat․ This innovative approach allows the Advantium oven to cook food up to eight times faster than conventional ovens‚ without sacrificing quality or taste․ This technology utilizes halogen lamps to generate intense radiant heat‚ which‚ combined with microwave energy‚ creates a unique cooking environment․ The result is perfectly browned and cooked food‚ with results typically associated with traditional ovens․ The Advantium’s design enables it to function as a microwave‚ a convection oven‚ a toaster oven‚ and a broiler‚ all in one appliance․ This multi-functionality enhances its value and usefulness in the modern kitchen․ The combination of microwave‚ radiant‚ and convection heat allows for a wider range of cooking styles‚ making it a versatile tool for any cooking task․ The system is designed for even cooking‚ ensuring consistent results each time․ The manuals provide detailed information on utilizing these features effectively․

Microwave and Oven Combination

The GE Profile Advantium 120 uniquely combines microwave and oven functionalities‚ offering users a versatile cooking appliance․ This combination allows for both rapid microwave cooking and traditional oven-style baking‚ broiling‚ and roasting․ The integration of these two distinct cooking methods in a single unit makes the Advantium a space-saving and efficient choice for any kitchen․ The microwave function provides the speed and convenience needed for quick meals and reheating‚ while the oven capabilities allow for more elaborate dishes that require even heating and browning․ This seamless transition between microwave and oven modes is a key feature of the Advantium․ The appliance’s design and technology enable it to function effectively in both modes‚ providing consistent and reliable performance․ This combination not only saves space but also provides the user with a broader range of cooking options․ The user manuals provide detailed explanations of each mode and offer guidance on which mode is suitable for different types of food‚ ensuring optimal results․ The flexibility of the Advantium system provides homeowners with a truly multi-functional kitchen appliance․

Troubleshooting Information

The GE Profile Advantium 120 manuals include valuable troubleshooting sections to assist users with common issues․ These sections provide guidance on diagnosing problems and offer solutions‚ such as fuse replacement and dealing with error codes‚ ensuring smooth operation․

Common Issues and Solutions

GE Profile Advantium 120 microwave owners may encounter several common issues that can often be resolved with the help of the user manual․ One frequent problem is the microwave not heating food properly‚ which can sometimes be attributed to a faulty magnetron or a blown fuse․ Another issue reported by users is the stop/cancel button not working‚ possibly indicating a problem with the control panel or internal circuitry․ If the unit is completely unresponsive‚ with no lights or control panel display‚ checking the power outlet and internal fuses is crucial․ Additionally‚ problems with the turntable not rotating or the convection feature not functioning correctly are also among the common complaints․ The manuals often provide step-by-step instructions for troubleshooting these issues‚ including how to test for a microwave-safe dish and what to do if the unit sparks during operation․ It is important to consult the specific manual for your model to accurately diagnose and address these concerns‚ ensuring safe and effective operation of the appliance․ Furthermore‚ issues with the light bulb shorting out are also documented‚ with possible solutions‚ and the manuals stress the importance of following safety guidelines while performing any troubleshooting steps․

Fuse Replacement Instructions

Replacing a fuse in a GE Profile Advantium 120 microwave should always be approached with caution and adherence to safety guidelines․ The manuals usually outline the procedure‚ emphasizing the need to disconnect the appliance from the power source before attempting any repairs․ Typically‚ the fuse is located within the microwave’s control panel or in an area accessible after removing the outer casing․ The instructions often specify the type of fuse required‚ which is essential for proper functioning and safety․ It is generally advised to consult the specific manual for your model‚ as fuse locations and replacement procedures might vary․ The manuals typically include diagrams or illustrations to guide the user through the process․ If you are uncomfortable working with electrical components‚ it’s best to seek assistance from a qualified technician․ Always ensure the replacement fuse is rated correctly‚ and never attempt to bypass the fuse‚ as it is a crucial safety component․ Before replacing the fuse‚ it is also important to inspect the wiring and connections to identify any underlying causes for the blown fuse to prevent recurring issues․ Additionally‚ some models may have multiple fuses‚ so it is critical to identify the specific one that needs replacement․